
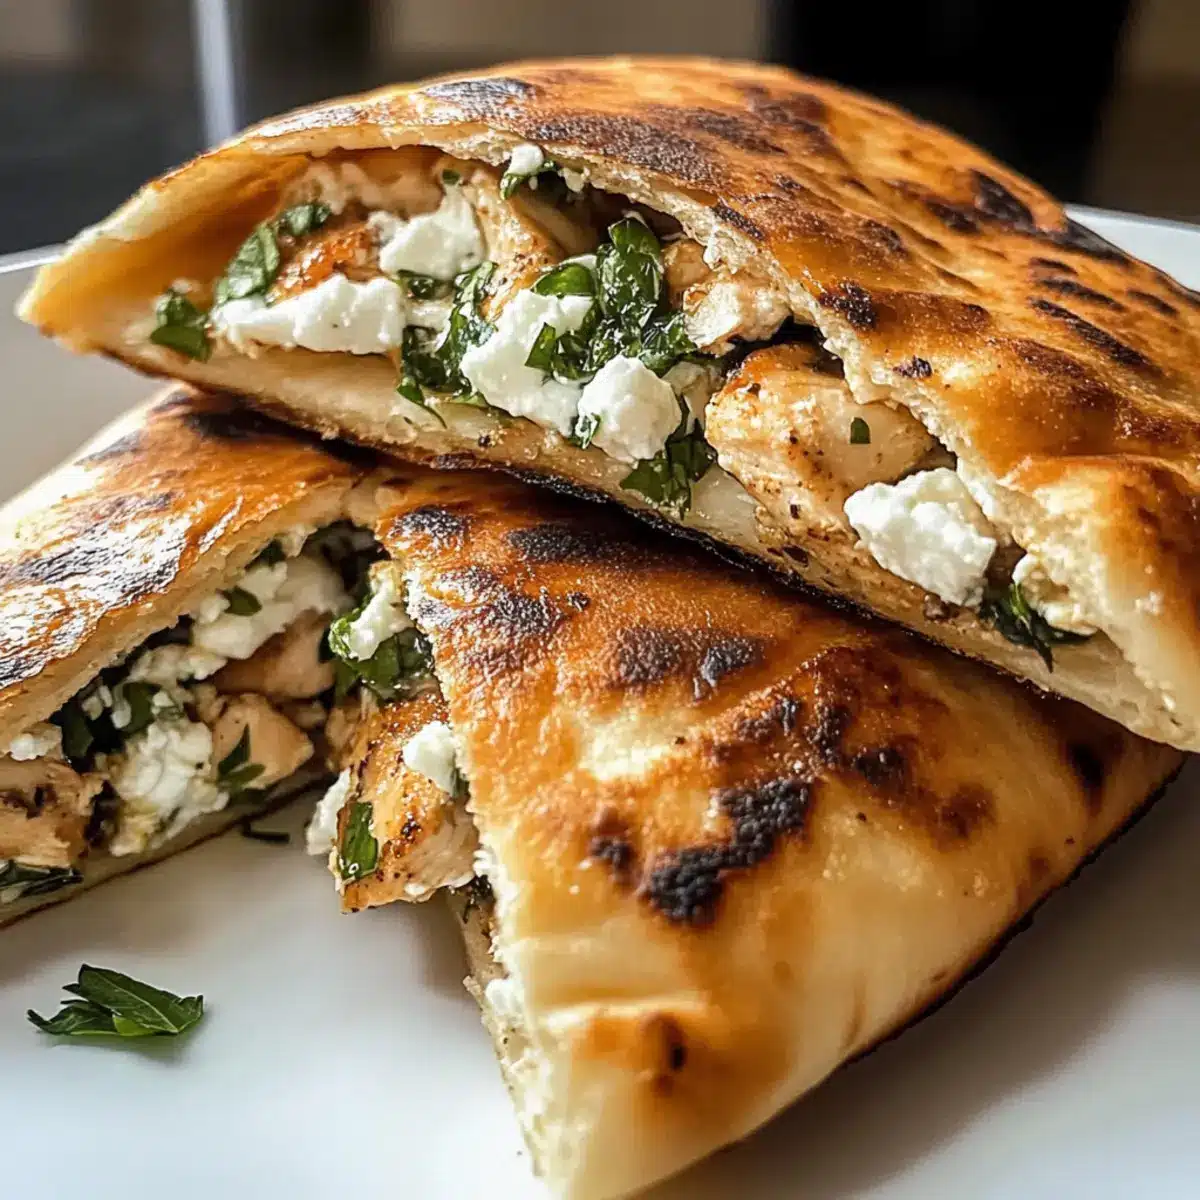
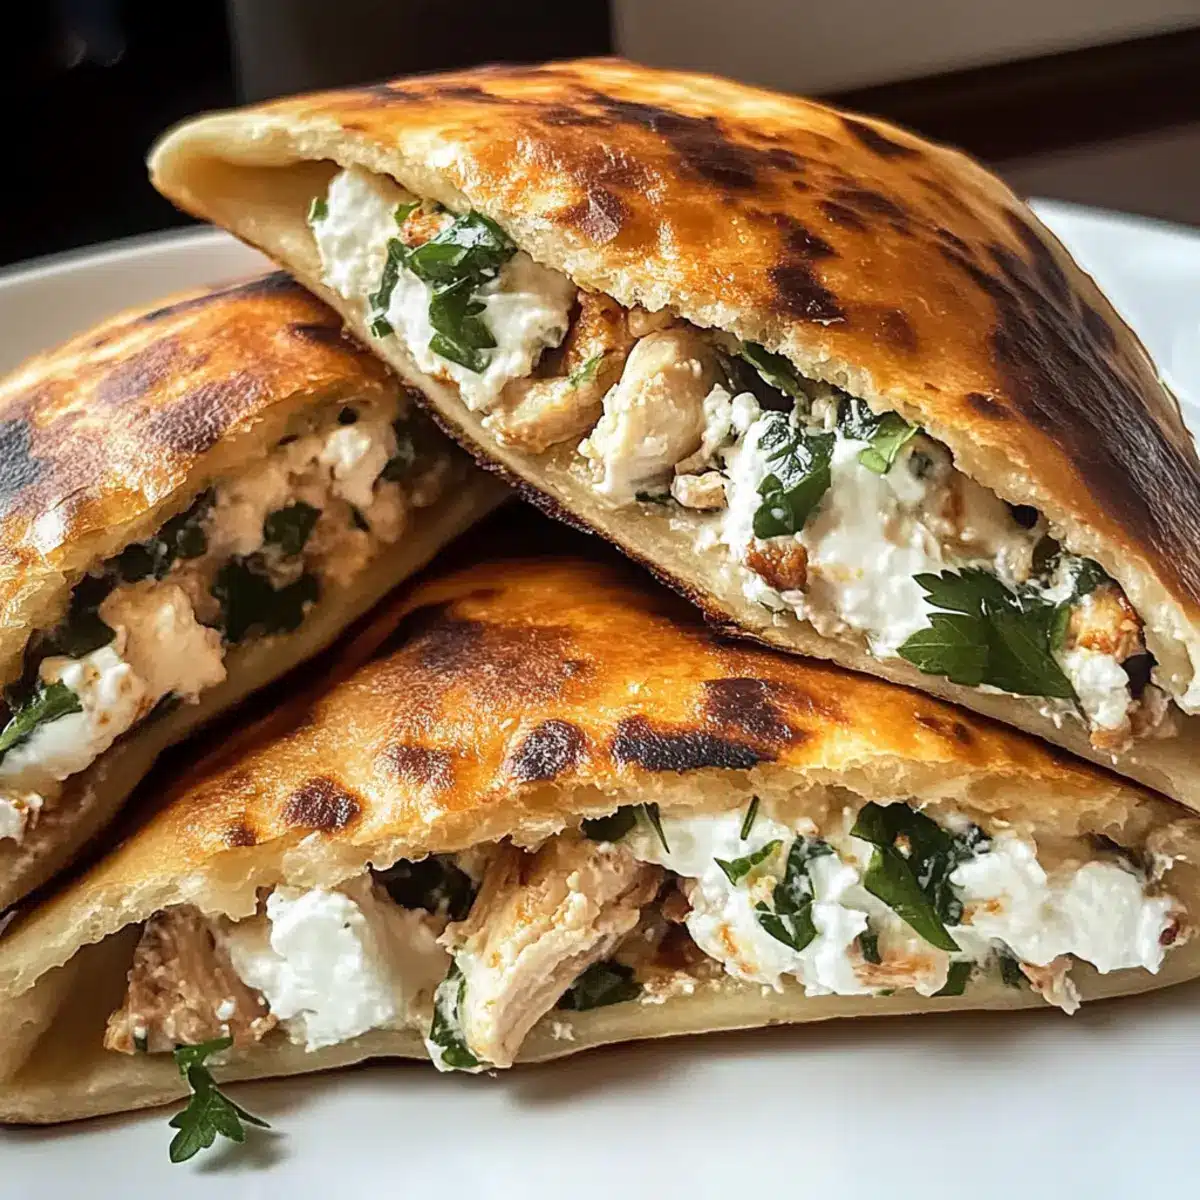
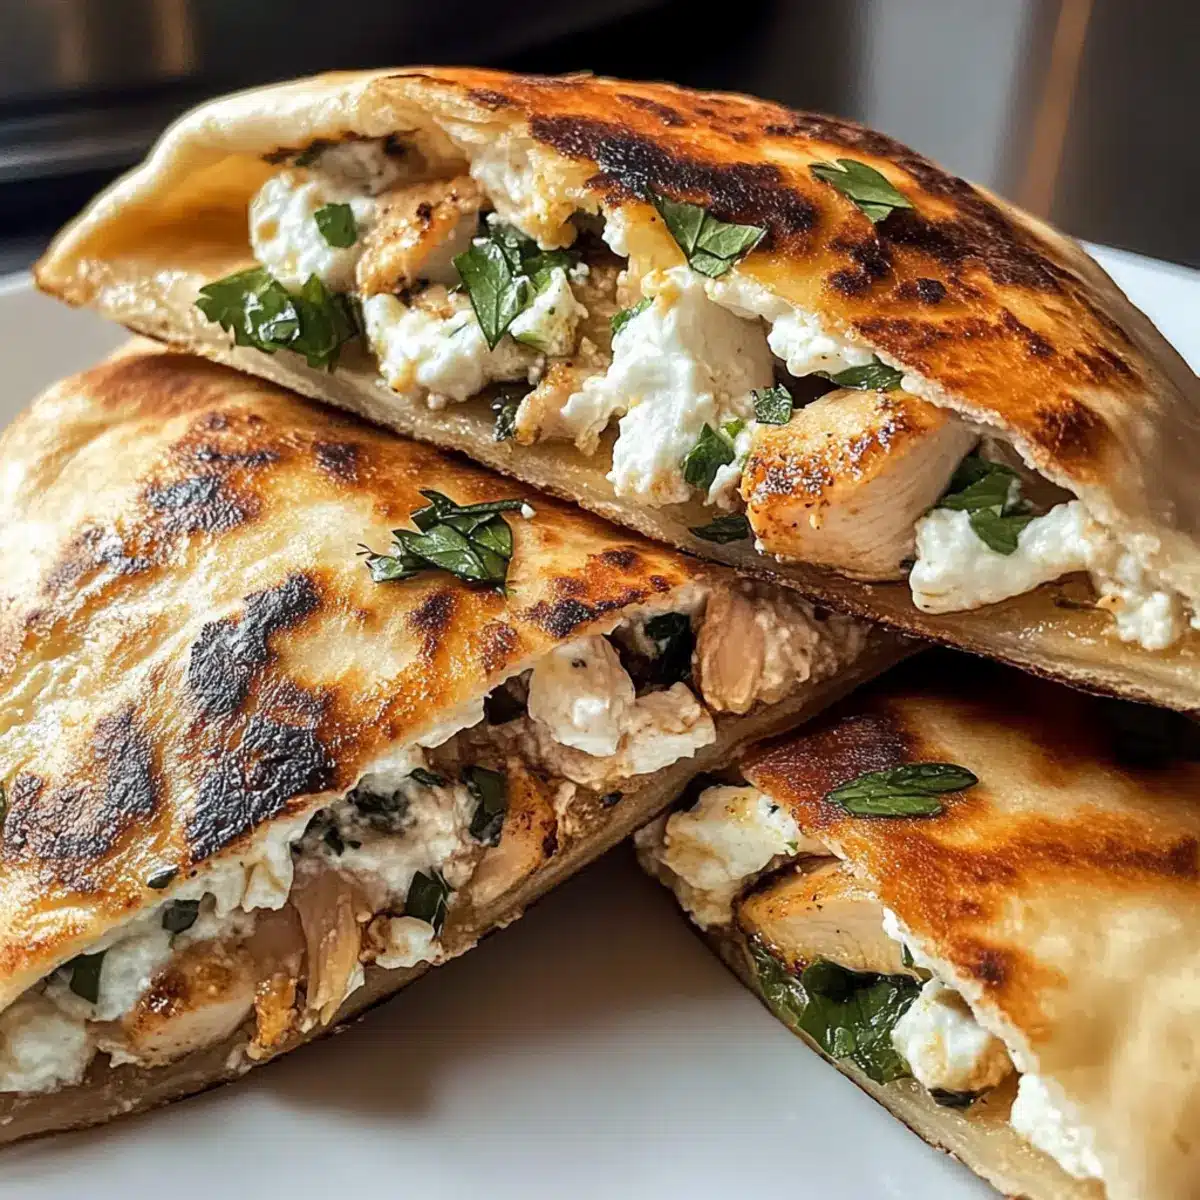
As I was flipping through an old cookbook, I stumbled upon a gem that instantly sparked my craving for something crispy yet satisfying. Enter Crispy Pita with Chicken & Feta—a dish that marries the crunch of golden pita with the delights of a savory filling. This recipe caters perfectly to anyone searching for a high-protein meal that’s not only healthy but can also be whipped up in just under 30 minutes! Whether you’re welcoming guests or simply treating yourself to a comforting dinner, these stuffed pitas are a delightful crowd-pleaser that will make you look like a master chef. Plus, the customizable options allow you to tailor each pocket to your own taste. Ready to discover the secret behind this scrumptious dish? Let’s dive in!
Why is this Crispy Pita special?
Quick preparation: In just 30 minutes, you can serve these delightful pockets, making them perfect for busy weeknights.
High-protein: Packed with lean chicken and feta, they offer a nutritious boost that’ll keep you satisfied.
Customizable flavors: Feel free to switch up the herbs or add a spicy kick with jalapeños! The options are endless.
Crispy perfection: The golden, crunchy exterior creates an irresistible texture contrast with the moist filling—absolute perfection!
Crowd-pleaser: Serve these at your next gathering alongside tzatziki sauce or a Greek salad, and impress your guests with ease!
Fun for all ages: Kids and adults alike will adore these pitas, making dinner a stress-free and enjoyable experience.
Crispy Pita with Chicken & Feta Ingredients
For the Filling
- Lean Chicken Mince – Provides protein and substance to the filling; can substitute with ground turkey for a lighter option.
- Feta Cheese – Adds creaminess and tang; goat cheese can be used for a richer taste.
- Red Onion – Adds sweetness and pungency; shallots can be used for a milder onion flavor.
- Garlic – Enhances flavor profile; fresh garlic is preferred for optimal taste.
- Lemon Juice & Zest – Brightens up the filling; fresh lemon is best for maximum flavor.
- Fresh Mint – Contributes a refreshing note; can substitute with fresh basil for a different flavor.
- Fresh Parsley – Adds a mild peppery flavor; remove if a stronger herb flavor is preferred.
For Cooking
- Olive Oil – Used for frying to achieve crispiness; other oils like avocado can also work.
- Pita Bread – Envelops the filling, creating pockets; whole wheat pita can be used for a healthier alternative.
Step‑by‑Step Instructions for Crispy Pita with Chicken & Feta
Step 1: Prepare the Filling
In a large mixing bowl, combine the lean chicken mince, crumbled feta cheese, finely chopped red onion, minced garlic, lemon juice, and zest. Add the fresh mint and parsley, seasoning generously with salt and pepper to taste. Mix thoroughly until all ingredients are well incorporated, ensuring that the flavors blend beautifully. This filling will bring deliciousness to your Crispy Pita with Chicken & Feta.
Step 2: Stuff the Pitas
Carefully slice the pita bread in half to create pockets. Gently fill each pita half with the chicken and feta mixture, making sure to avoid overstuffing to prevent them from bursting during cooking. Aim for a generous but manageable amount of filling in each pocket, allowing enough space at the top for closing. This careful stuffing is key to your Crispy Pita with Chicken & Feta’s success!
Step 3: Fry the Pitas
Heat about 2 tablespoons of olive oil in a large skillet over medium heat. Once the oil is shimmering, place the stuffed pitas in the skillet, cooking them for 3-4 minutes on each side until they are golden brown and crispy. Use a spatula to gently press them down for even cooking, ensuring a perfectly crunchy exterior on your Crispy Pita with Chicken & Feta.
Step 4: Bake for Extra Crispiness (Optional)
For added crispiness, preheat your oven to 180°C (350°F). After frying, transfer the golden pitas to a baking sheet and place them in the oven for 10-15 minutes. This step enhances the crunch of your Crispy Pita with Chicken & Feta, making them even more delightful. Keep an eye on them to avoid over-baking!
Step 5: Serve
Once baked, remove the pitas from the oven and let them cool slightly for a couple of minutes. Serve them warm alongside tzatziki sauce or your favorite dipping sauce. The combination of crispy texture and savory filling will make your Crispy Pita with Chicken & Feta a standout dish everyone will love.

Make Ahead Options
These Crispy Pita with Chicken & Feta are perfect for busy cooks looking to save time during the week! You can prepare the filling (chicken, feta, onions, garlic, and herbs) up to 24 hours in advance; simply mix everything together and refrigerate in an airtight container to maintain freshness. Additionally, you can stuff the pitas and keep them in the fridge for up to 3 days—just make sure they’re covered well to prevent drying out. When you’re ready to serve, pan-fry the pitas straight from the fridge, cooking until golden brown and crispy. For an extra crunch, place them in the oven for a few minutes. Enjoy delicious, hassle-free meals with this make-ahead strategy!
How to Store and Freeze Crispy Pita with Chicken & Feta
Fridge: Store any leftovers in an airtight container for up to 3 days to keep them fresh and flavorful.
Freezer: Freeze unstuffed pita pockets in a sealed freezer bag for up to 2 months. This allows you to prepare the filling fresh later!
Reheating: When ready to enjoy, reheat in an oven or air fryer at 180°C (350°F) for crispy results. Avoid the microwave, as it can make them soggy.
Preparation Tip: For best results, prepare your Crispy Pita with Chicken & Feta filling ahead of time and store separately before stuffing and cooking!
Expert Tips for Crispy Pita with Chicken & Feta
Use Fresh Herbs: Fresh mint and parsley enhance the flavor significantly. Avoid dried herbs for the best taste and aroma.
Stuff with Care: Don’t overstuff the pitas. Leaving a little space at the top prevents bursting during cooking and ensures even frying.
Heat the Oil: Make sure the olive oil is hot before adding the stuffed pitas. This step is crucial for achieving that crispy texture.
Oven for Leftovers: If you have leftovers, reheat them in the oven or air fryer to maintain their delicious crunch instead of using the microwave.
Customize Wisely: Feel free to change ingredients or add spices, but ensure your fillings blend well for the unique flavors of your Crispy Pita with Chicken & Feta.
What to Serve with Crispy Pita with Chicken & Feta
A delightful spread will elevate your meal, bringing colors and flavors that complement each bite!
- Tzatziki Sauce: The cool creaminess of tzatziki perfectly balances the warmth of the crispy pita, enhancing each flavorful bite.
- Greek Salad: This refreshing mix of cucumbers, tomatoes, and olives adds crunch and a bright flavor contrast, making your meal vibrant.
- Roasted Vegetables: A medley of seasonal vegetables provides earthy flavors and adds an irresistible roasted sweetness alongside your pitas.
- Quinoa Tabouli: Nutty quinoa tossed with herbs and fresh veggies aligns beautifully with the herbaceous notes in the pita filling.
- Hummus Platter: Creamy hummus pairs wonderfully as a dip, offering a silky texture that complements the crispy exterior of the pitas.
- Minted Yogurt Drink: Cool and refreshing, this drink enhances the Mediterranean experience, washing down your meal with a delightful finish.
- Stuffed Grape Leaves: Tangy and savory, these appetizers deepen the Mediterranean theme, delighting guests and adding unique flavor layers to your meal.
- Baklava for Dessert: End your meal with a sweet note; the rich, layered pastry contrasts delightfully with the flavors of your crispy pita!
- Sparkling Water with Lemon: A light, fizzy drink enhances the overall meal while cleansing the palate between bites of savory goodness.
Crispy Pita with Chicken & Feta Variations
Feel free to let your culinary creativity shine by customizing your Crispy Pita with Chicken & Feta and exploring delicious alternatives!
-
Vegetarian Option: Replace chicken with roasted mushrooms or lentils for a hearty, plant-based filling. The earthy flavors will still delight any palate.
-
Spicy Kick: Add finely chopped jalapeños or a spoonful of harissa to the mixture for an exciting heat. Spice lovers will appreciate this zesty twist!
-
Cheese Variation: Swap feta with cream cheese or add mozzarella for a gooey, melty texture. You can experiment with different cheese types to discover your favorite.
-
Baked Version: Omit frying altogether and bake the stuffed pitas at 200°C (400°F) until golden. This lighter option is perfect for health-conscious foodies.
-
Herb Switch: Change fresh mint for dill or cilantro for a completely different flavor profile. Each herb brings its own personality, enhancing the dish’s freshness!
-
**Loaded: **Top your filled pitas with a sprinkle of diced tomatoes or cucumber before serving. These toppings add a refreshing crunch that pairs beautifully with the crispy pita.
-
Creamy Sauce: For an added richness, serve with a drizzle of tahini or a spicy yogurt dressing on the side. These creamy options elevate your Crispy Pita experience!
-
Flavor Infusion: Inject additional zing by marinating the chicken in lemon juice or yogurt before mixing. This extra step pays off with juicy, flavorful filling every time.
Try these variations to surprise your taste buds or transform your family mealtime! If you’re looking for something different, check out the delightfully tasty Fiery Chicken Ramen or the sweet and savory Honey Feta Chicken for more inspiration.
Crispy Pita with Chicken & Feta Recipe FAQs
What type of chicken is best for this recipe?
I recommend using lean chicken mince for a high-protein filling. Ground turkey is a great alternative if you’re looking for a lighter option.
How should I store leftovers?
Store any leftover Crispy Pita with Chicken & Feta in an airtight container in the refrigerator for up to 3 days. This keeps them fresh and tasty while you enjoy them over the next few meals!
Can I freeze the stuffed pitas?
Absolutely! You can freeze unstuffed pita pockets in a sealed freezer bag for up to 2 months. When you’re ready to eat, prepare your filling fresh and then stuff them before cooking.
What if my pitas don’t turn out crispy?
No worries! Ensure that the oil is hot before frying the stuffed pitas—this is key to achieving that delicious crunch. If you’re baking them, keep an eye on your oven to avoid over-baking which can lead to a dry texture.
Are there any dietary considerations for this recipe?
Yes, if you’re cooking for young kids or anyone with dietary restrictions, you can customize the filling. For those with dairy allergies, swap out feta for a dairy-free cheese or omit it altogether. Just make sure to check for any allergens based on your guests’ needs.
What can I serve with the Crispy Pita?
To create a complete meal, pair these flavorful pitas with a refreshing tzatziki sauce, a vibrant Greek salad, or some roasted vegetables. The more, the merrier!
Crispy Pita with Chicken & Feta: Quick and Flavorful Delight
Ingredients
Equipment
Method
- In a large mixing bowl, combine the lean chicken mince, crumbled feta cheese, finely chopped red onion, minced garlic, lemon juice, and zest. Add the fresh mint and parsley, seasoning generously with salt and pepper. Mix thoroughly.
- Carefully slice the pita bread in half to create pockets. Fill each pita half with the chicken and feta mixture, leaving space at the top for closing.
- Heat about 2 tablespoons of olive oil in a skillet over medium heat. Once the oil is hot, place the stuffed pitas in the skillet, cooking for 3-4 minutes on each side until golden brown.
- For added crispiness, preheat your oven to 180°C (350°F). Transfer the pitas to a baking sheet and bake for 10-15 minutes.
- Let them cool for a couple of minutes before serving warm with tzatziki sauce or your favorite dipping sauce.
Leave a Reply