
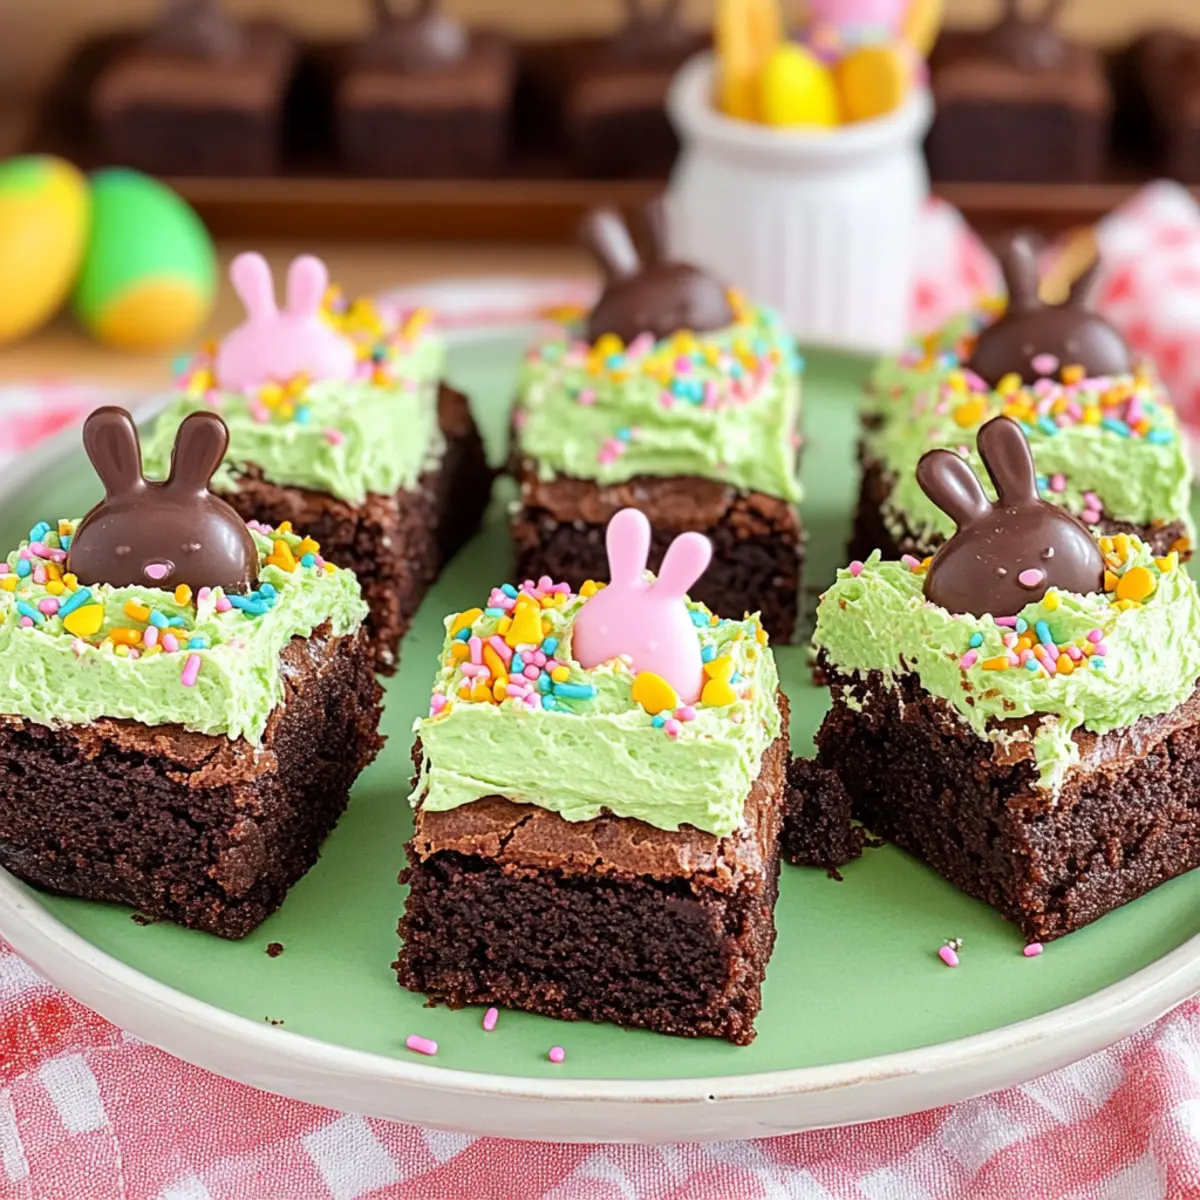
As I pulled a tray of warm brownies from the oven, the rich chocolate aroma wrapped around me like a cozy blanket. These aren’t just any brownies, though; they transform into fun Easter Bunny Brownies, making them the star of any festive gathering! With generous swirls of vibrant frosting and the cutest chocolate bunnies perched atop, these treats are the embodiment of springtime joy. Not only do they cater to the playful spirit of Easter festivities, but they also whip up quickly, making them a perfect choice for busy home chefs looking to impress. So, whether you’re hosting a family brunch or need a sweet addition for the school bake sale, these brownies are sure to delight! Ready to hop into the fun? Let’s dive into how you can create these delightful spring treats together!

Why Make Easter Bunny Brownies?
Fun and Festive: These delightful brownies are not just dessert; they’re a whimsical centerpiece that brings a smile to everyone at your gathering. Quick and Easy: With simple ingredients and straightforward steps, even beginner bakers can whip them up in no time. Versatile: Customize the decoration with different sprinkles or colors to fit any occasion, making them perfect beyond Easter. Tasty Treats: The rich chocolate flavor combines beautifully with the vibrant frosting, appealing to both kids and adults alike. Great for Sharing: They’re cut into squares, making them perfect for potlucks, parties, or just a delicious treat to brighten your day. Discover more fun baking ideas in our Baking Basics section to keep the fun going!
Easter Bunny Brownies Ingredients
For the Brownies
- Butter – Adds richness and moisture to the brownies; use softened butter for easy mixing.
- Granulated Sugar – Sweetens the brownies, giving them that indulgent taste; opt for white sugar for a classic flavor.
- Unsweetened Cocoa Powder – Provides a deep chocolatey flavor; make sure to use quality cocoa for the richest taste.
- Eggs – Binds the ingredients together, ensuring a fudgy texture; let them come to room temperature for better mixing.
- All-Purpose Flour – Creates the structure of the brownies; don’t overmix once added to keep them fudgy.
- Salt – Enhances the brownie flavor, balancing the sweetness; a pinch goes a long way!
- Vanilla Extract – Introduces warmth and depth; pure vanilla extract is always the best option.
For the Frosting
- Powdered Sugar – Sweetens and thickens the frosting, helping to achieve that smooth texture; you may need 2-3 extra tablespoons for desired consistency.
- Butter – Ensures a creamy, spreadable frosting; opt for softened butter for easy mixing.
- Milk – Adjusts the frosting’s consistency; any type of milk will work, so use what you have on hand.
- Food Coloring – Tints the frosting to create festive colors; pick shades that match your Easter theme.
For Decoration
- Chocolate Bunnies – Serve as a delightful decoration and fun treat atop the brownies; any brand will do; find them easily at local stores.
- Sprinkles – Add a pop of color and fun; choose festive sprinkles that bring your dessert to life.
With these Easter Bunny Brownies ingredients at hand, you’re all set to create a dessert that not only looks adorable but tastes amazing too! Perfect for your upcoming Easter celebration, these delightful treats will surely be a hit. Enjoy your baking adventure!
Step‑by‑Step Instructions for Easter Bunny Brownies
Step 1: Prep the Brownies
Preheat your oven to 350°F (175°C) and grease a baking dish or line it with parchment paper for easy removal. In a mixing bowl, combine softened butter, granulated sugar, and cocoa powder, stirring until well-blended. Add in eggs one at a time, mixing after each addition. Fold in flour and salt gently until just combined, avoiding overmixing for that fudgy texture. Pour the brownie batter into the prepared dish and bake for 25–30 minutes or until a toothpick comes out with moist crumbs.
Step 2: Make the Frosting
While the brownies are cooling, gather a large mixing bowl and beat together softened butter and 1 cup of powdered sugar using an electric mixer until smooth and creamy. Pour in vanilla extract and a splash of milk, mixing until well incorporated. Gradually add the remaining powdered sugar, adjusting with extra tablespoons as needed for the perfect spreadable consistency. The frosting should be creamy and light, ideal for your Easter Bunny Brownies.
Step 3: Color the Frosting
Choosing your favorite food coloring, begin stirring small amounts into the frosting until you achieve vibrant colors that match your Easter theme. Take care to blend the color evenly throughout the frosting. If the frosting appears too thick, add a splash more milk, mixing well until it reaches your desired consistency. This bright, colorful frosting will beautifully complement the rich chocolate brownies.
Step 4: Decorate
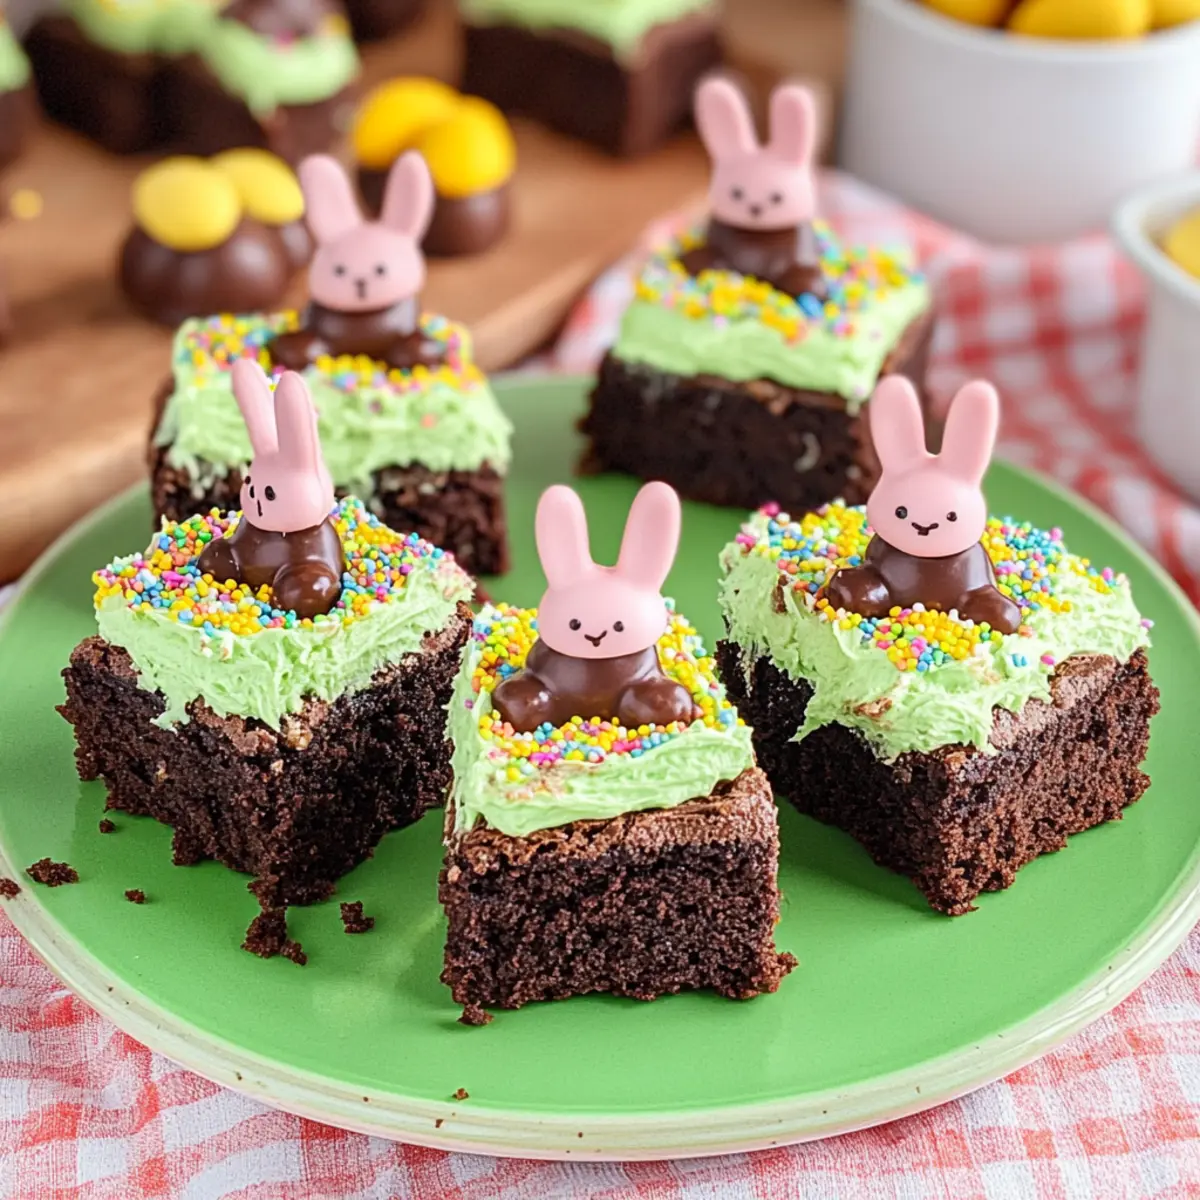
Once the brownies have completely cooled, use a spatula to spread a generous layer of the colored frosting evenly across the top. Be playful with your design, adding festive sprinkles all over for extra charm. Place the adorable chocolate bunnies on top of each brownie, ensuring they are nestled into the frosting, ready to catch the eye of your guests. The combination of creamy frosting and cute bunnies makes these Easter Bunny Brownies truly special.
Step 5: Serve
After decorating, allow the brownies to set for about 15 minutes, which helps the frosting firm slightly. Once ready, use a sharp knife to cut the brownies into squares or rectangles, making sure to slice through cleanly. Arrange the brownie squares on a decorative platter, and watch them disappear at your Easter gathering. Enjoy the warm smiles these charming Easter Bunny Brownies bring to your spring celebration!
Expert Tips for Easter Bunny Brownies
-
Use Softened Butter: Ensure your butter is softened to room temperature for a smooth frosting that spreads effortlessly across the brownies.
-
Check for Doneness: Avoid overbaking by using the toothpick test; it should come out with a few moist crumbs for that fudgy texture in your Easter Bunny Brownies.
-
Adjust Frosting Consistency: If your frosting is too thick, add a little more milk to achieve a creamy texture, perfect for decorating the brownies.
-
Play with Colors: Don’t hesitate to mix food colors for unique frosting shades—fun pastel hues will elevate the visual appeal of your Easter Bunny Brownies.
-
Creative Decorations: Add non-chocolate decorations, like edible flowers or colorful candies, for an extra festive touch that will delight all ages.
-
Cut with Precision: For clean brownie squares, use a warm knife to slice through the layers, minimizing mess and ensuring each piece showcases your beautiful designs.
Make Ahead Options
These festive Easter Bunny Brownies are perfect for meal prep, making them an excellent choice for busy home cooks! You can bake the brownie base up to 24 hours in advance. Simply allow them to cool completely before wrapping them tightly in plastic wrap and refrigerating to maintain their fudgy texture. The frosting can be prepared and stored in an airtight container at room temperature for 1-2 days, saving you time on the day of your celebration. When ready to serve, just frost the brownies and add the adorable chocolate bunnies. This way, you’ll have a delightful dessert that’s just as delicious as if you made it fresh!
What to Serve with Easter Bunny Brownies
Bring your Easter gathering to life by pairing these delightful brownies with complementary sides and treats that amplify the festive spirit!
-
Vanilla Ice Cream: A scoop of creamy vanilla ice cream balances the rich chocolate flavor, creating a delightful contrast with every bite.
-
Fresh Fruit Salad: Bright and refreshing, a mix of seasonal fruits adds a burst of color and a light, zesty kick to your dessert table.
-
Chocolate Milk Shake: Indulge in a decadent chocolate milkshake that echoes the flavors of the brownies, making dessert doubly delicious.
-
Whipped Cream: A dollop of fluffy whipped cream enhances the brownies with soothing creaminess, inviting everyone to dig in.
-
Mini Cheesecakes: Individual mini cheesecakes provide a luscious texture, offering a delightful sweet-tart contrast that complements the fudgy brownies.
-
Easter-themed Cookies: Pair with festive sugar cookies topped with pastel icing for a cheerful addition that echoes the magic of spring celebrations.
-
Lemonade: A refreshing glass of homemade lemonade adds a bright twist, balancing the rich indulgence with its citrusy zing.
Combining the whimsical touch of Easter Bunny Brownies with these delightful pairings will elevate your dessert spread, bringing joy and smiles to your celebration!
Storage Tips for Easter Bunny Brownies
-
Room Temperature: Store your Easter Bunny Brownies covered at room temperature for up to 3 days. This helps maintain their fudginess while keeping the frosting fresh.
-
Fridge: For longer freshness, refrigerate the brownies in an airtight container for up to a week. Allow them to come to room temperature before serving for the best flavor.
-
Freezer: Freeze the brownies in a single layer, tightly wrapped in plastic wrap and placed in a freezer-safe bag, for up to 3 months. Thaw overnight in the fridge before enjoying.
-
Reheating: If desired, gently reheat individual brownie squares in the microwave for about 10–15 seconds, ensuring they remain moist and delicious.
Easter Bunny Brownies Variations & Substitutions
Ready to add your own twist to these delightful Easter Bunny Brownies? Let your creativity shine as we explore some fun and tasty variations!
- Dairy-Free: Substitute regular butter with coconut oil or a dairy-free margarine to make a vegan version. Pair it with vegan chocolate bunnies for a full dairy-free delight!
- Gluten-Free: Use a gluten-free all-purpose flour blend instead of regular flour. This swap ensures everyone can enjoy these festive treats at your gathering.
- Nutty Flavor: Add 1/2 cup of chopped walnuts or pecans into your brownie batter for an added crunch and nutty flavor that pairs beautifully with the chocolate.
- Minty Fresh: Incorporate a drop of peppermint extract into your frosting for a refreshing mint chocolate combination. It’s a delightful surprise that everyone will love!
- Alternative Colors: Experiment with natural food colorings like beet juice for pink or turmeric for yellow to create beautiful, vibrant frosting that’s also fun and festive.
- Stout Brownies: Enhance the chocolate flavor by adding 1/4 cup of dark beer or stout into your brownie batter. It will deepen the taste and add a unique twist to your dessert!
- Extra Sprinkles: Mix in pastel-colored chocolate chips or more festive sprinkles directly into the brownie batter before baking for an even more lively, colorful treat.
- Easter Egg Surprise: Before the brownies set, gently press mini chocolate eggs into the frosting for a fun surprise that complements the chocolate bunnies beautifully!
Feel free to discover more tips and tricks to elevate your baking experience with our helpful Baking Basics section! Happy baking!

Easter Bunny Brownies Recipe FAQs
What type of butter should I use for the brownies?
Absolutely! Use softened unsalted butter for the brownie batter for the best results. This will ensure a rich, moist texture. Avoid margarine, as it may not provide the same taste or consistency.
How should I store my Easter Bunny Brownies?
I recommend storing your brownies covered at room temperature for up to 3 days to maintain their moistness. If you’d like to keep them fresh longer, refrigerate them in an airtight container, where they can last up to a week. Always let them come to room temperature before serving for the best flavor!
Can I freeze the brownies?
Yes, you can! To freeze your Easter Bunny Brownies, first, let them cool completely, then wrap them tightly in plastic wrap and place them in a freezer-safe bag. They can be frozen for up to 3 months. To enjoy, simply thaw them in the fridge overnight, and they’ll be ready for your delight!
What if my frosting is too thick?
No worries! If you find your frosting is too thick to spread, slowly add more milk, a tablespoon at a time, mixing well after each addition until you achieve a creamy consistency that’s perfect for frosting. This gives you full control over the texture, so no brownie gets left behind!
Are there any allergy considerations for this recipe?
Yes! This recipe contains common allergens such as dairy and eggs. For a dairy-free option, swap the butter for a dairy-free alternative and use vegan chocolate bunnies. Always double-check the packaging to ensure products are free of allergens, especially when serving to guests with dietary restrictions.
Can I decorate the brownies differently?
The more, the merrier! Feel free to get creative with your decorations. You can use different candies, edible glitter, or themed sprinkles to add a personal touch. This not only makes the brownies festive but also allows for unique variations for other occasions beyond Easter!
Easter Bunny Brownies: Sweet Treats for a Festive Celebration
Ingredients
Equipment
Method
- Preheat your oven to 350°F (175°C) and grease a baking dish or line it with parchment paper.
- In a mixing bowl, combine softened butter, granulated sugar, and cocoa powder until blended. Add eggs one at a time, mixing after each addition.
- Fold in flour and salt gently until just combined. Pour into the prepared dish and bake for 25–30 minutes or until a toothpick comes out with moist crumbs.
- While the brownies cool, beat together softened butter and 1 cup of powdered sugar until smooth and creamy. Add vanilla and a splash of milk, mixing well.
- Gradually add remaining powdered sugar, adjusting with extra tablespoons as needed.
- Stir in food coloring until you achieve the desired colors. Add more milk if the frosting is too thick.
- Once cooled, spread a generous layer of frosting on the brownies and decorate with sprinkles and chocolate bunnies.
- Allow the brownies to set for about 15 minutes, then cut into squares and serve.
Leave a Reply