
As I opened my pantry this morning, I was greeted by a rainbow of colorful Smarties that practically begged to be transformed into something delightful. That’s when I decided it was the perfect time to whip up a batch of Daisy Cookies—a fun and easy treat that adds a touch of whimsy to any baking session, especially for those little hands eager to help. These cookies, with their charming floral shape and vibrant candy centers, not only satisfy sweet cravings but also encourage creativity in the kitchen. Plus, they’re a fantastic activity for a family day spent together, making it easy for everyone to get involved and have fun. Curious to see how we can make these delightful treats? Let’s get baking!

Why Are Daisy Cookies So Fun?
Kid-Friendly: These cookies are perfect for children to help make, promoting creativity and teamwork while in the kitchen. Colorful Treats: The bright Smarties not only add a burst of color but also a delightful crunch. Quick and Easy: With minimal steps and ingredients, you’ll have a batch of delicious cookies in no time! Versatile Options: Feeling adventurous? Try substituting the Smarties with sprinkles or chocolate chips! Memorable Moments: Bake these delightful Daisy Cookies with the family and create sweet memories that will last a lifetime. Perfect for tea parties or just a cozy afternoon snack! Want more sweet ideas? Check out our Apple Snickerdoodles Cozy for a fun twist on a classic!
Daisy Cookies Ingredients
• Note: Gather these simple ingredients to create delightful Daisy Cookies that will brighten any day!
For the Dough
- Butter – Provides richness and helps create a tender cookie. Note: Ensure it’s softened for easier mixing.
- Flour – Forms the structure of the cookies. Substitution: You can use a gluten-free flour blend for a gluten-free option.
- Sugar – Sweetens the cookie and contributes to browning. Optional: Use brown sugar for a deeper flavor.
For the Decoration
- Smarties – Serve as colorful centers of the cookies. Substitution: M&Ms, Skittles, or chocolate chips for a different look and taste.
Step‑by‑Step Instructions for DAISY COOKIES
Step 1: Preheat the Oven
Begin by preheating your oven to 190°C (375°F). This step is crucial for ensuring your Daisy Cookies bake evenly. While the oven heats up, take a moment to line a baking tray with parchment paper, making it ready for those delightful flower-shaped cookies.
Step 2: Prepare the Dough
In a large mixing bowl, combine the softened butter with flour and sugar. Use your fingers to rub the ingredients together until they form a crumbly dough, about 3-5 minutes. Make sure to fully incorporate the ingredients for a smooth texture. The mixture should feel buttery and slightly sticky, perfect for shaping your cookies.
Step 3: Knead the Dough
Transfer the crumbly dough onto a clean surface and knead it gently for about 2 minutes. Aim for a smooth and pliable dough; this step is key in achieving the perfect texture in your Daisy Cookies. If the dough feels too sticky, add a dusting of flour to help with the kneading process.
Step 4: Shape the Cookies
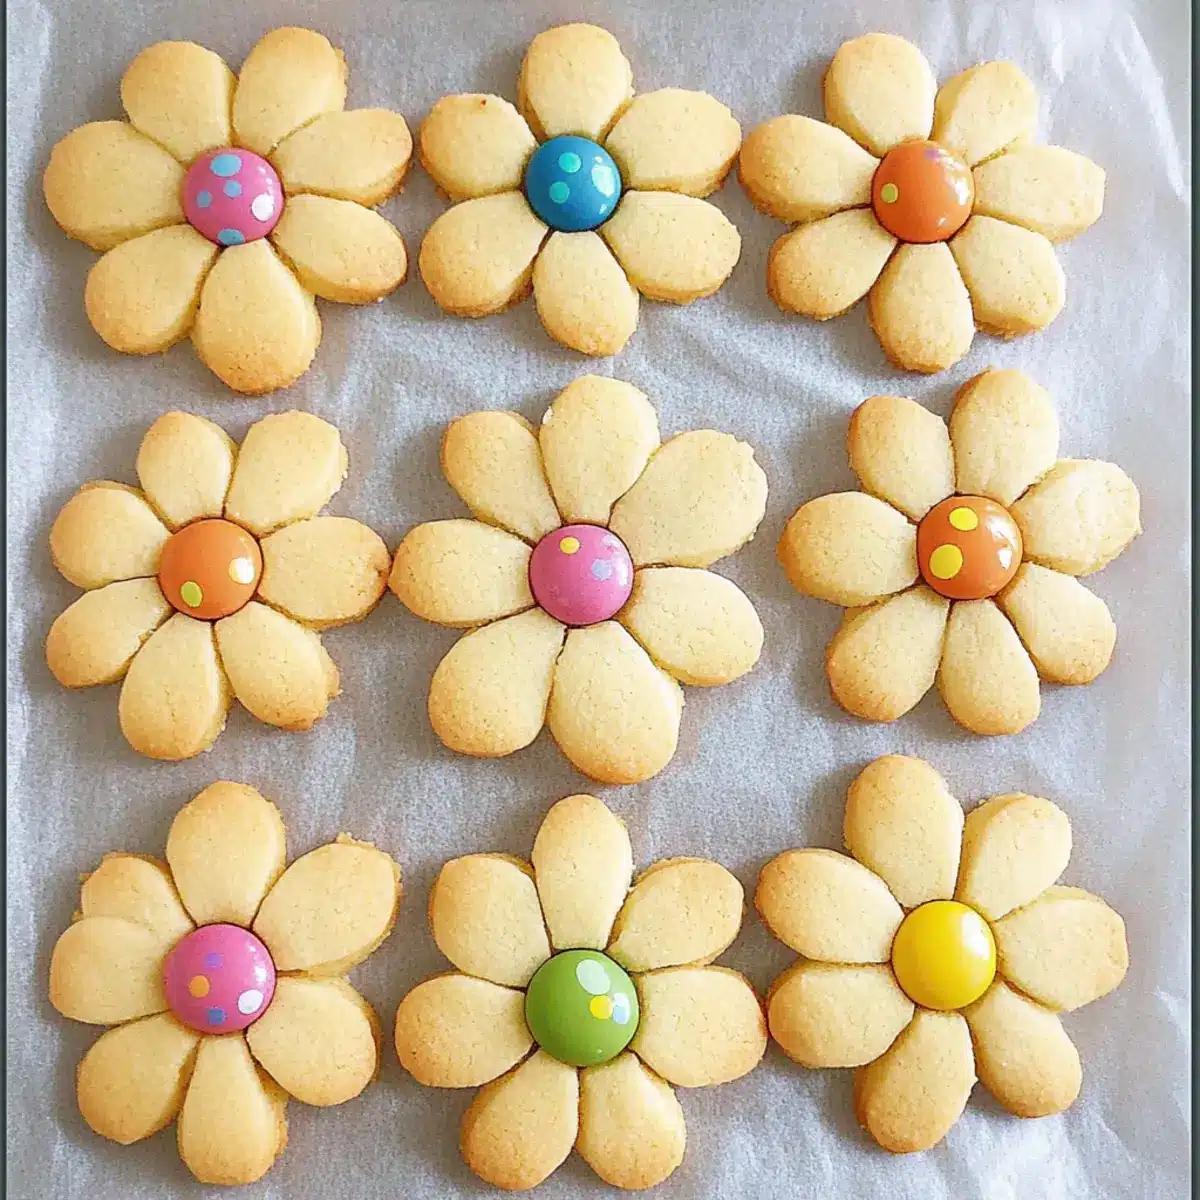
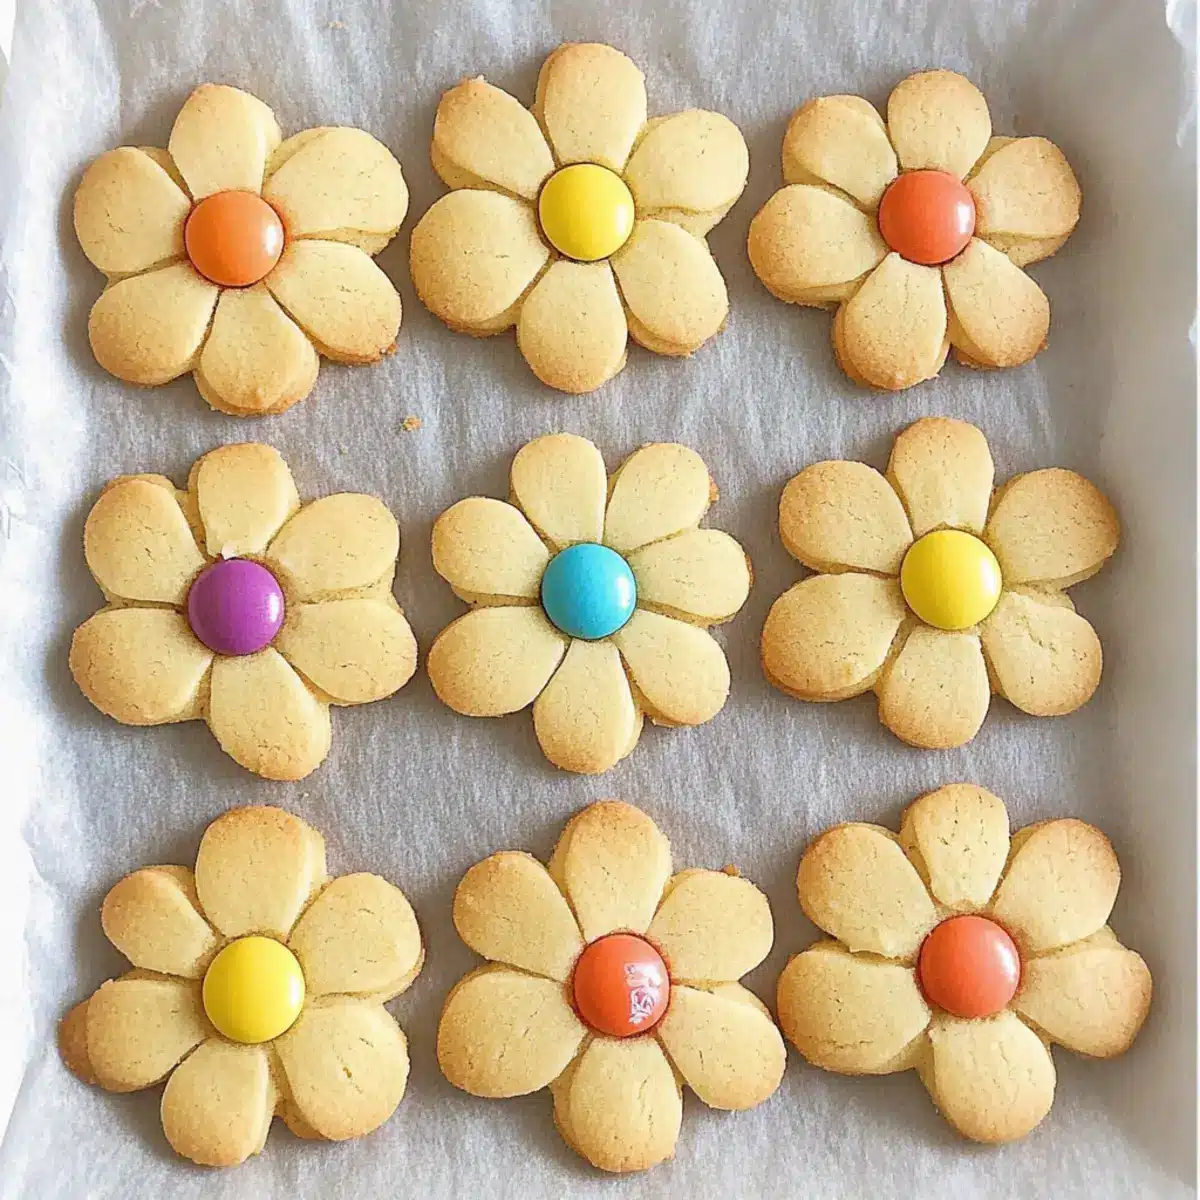
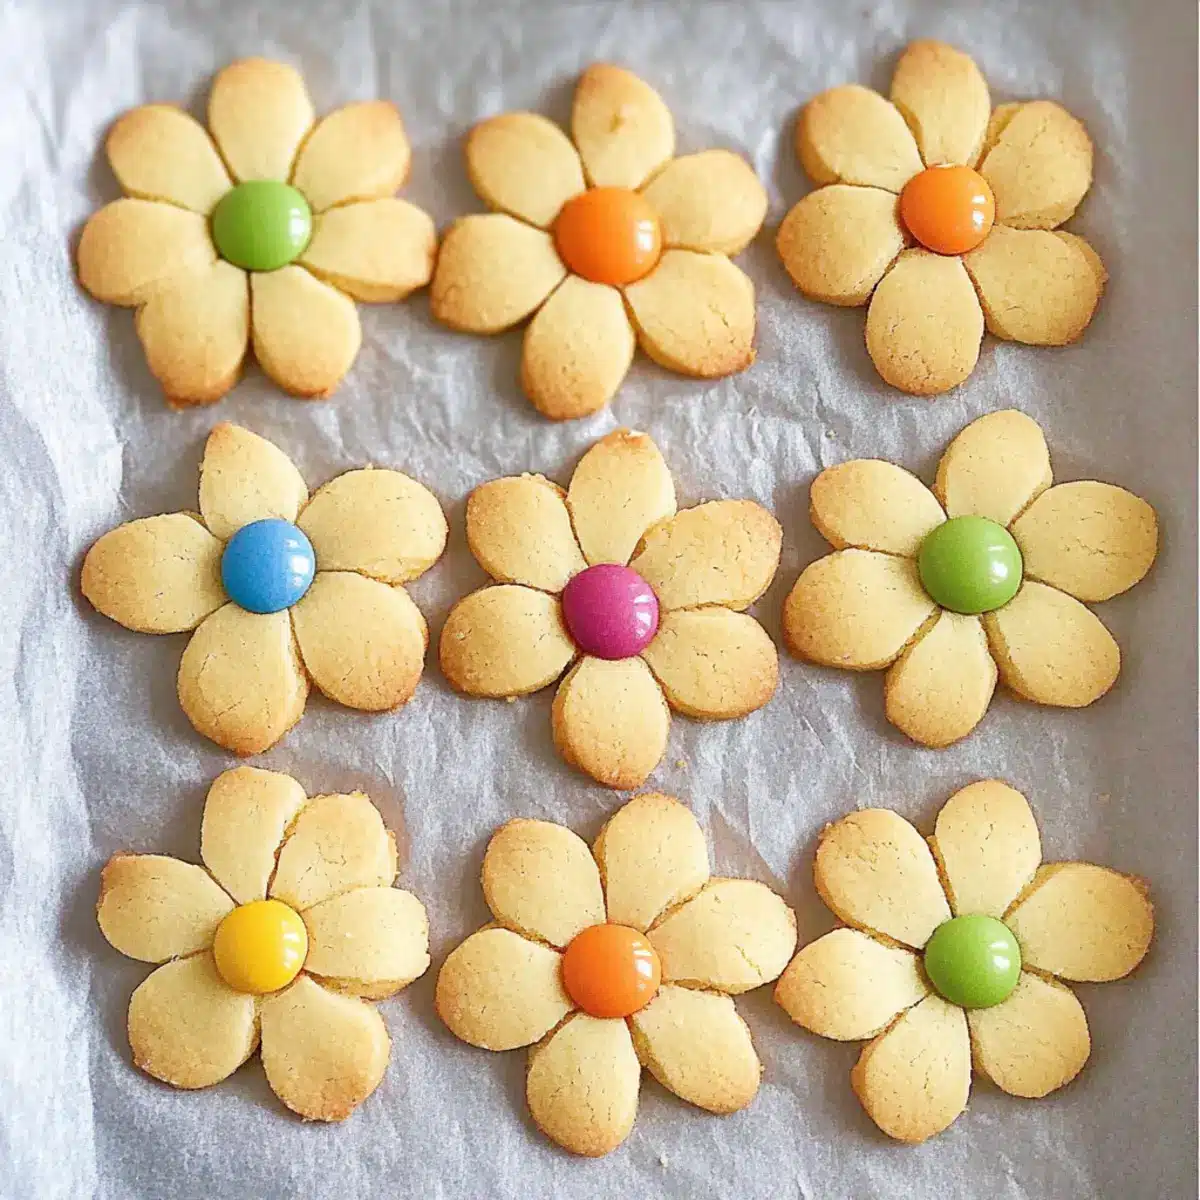
Roll the dough into small balls, each about the size of a walnut, around 5 for each cookie. Arrange them in a flower shape on the lined baking tray, leaving enough space between them for spreading. The whimsical design is what makes these Daisy Cookies so special!
Step 5: Flatten the Petals
Gently press down on each dough ball to create petal shapes, ensuring they slightly flatten without losing their roundness. The cookies will spread more when baked, but a little pre-flattening helps define those lovely petals.
Step 6: Add Smarties and Chill
Press a colorful Smartie into the center of each flower-shaped cookie, letting them nestle in the dough. Once all cookies are adorned, place the tray in the freezer for about 30 minutes. This freezing helps the cookies keep their shape while baking, resulting in beautifully formed Daisy Cookies.
Step 7: Bake the Cookies
Once chilled, place the tray in the preheated oven. Bake the Daisy Cookies for 8-10 minutes, watching closely for a light golden color around the edges. This indicates they are perfectly baked while still soft in the center.
Step 8: Cool and Serve
After baking, remove the tray from the oven and let the cookies cool on it for a few minutes before transferring them to a wire rack. Allow them to cool completely for about 10 minutes, enhancing their flavor and texture before serving. Enjoy these delightful Daisy Cookies!
Storage Tips for Daisy Cookies
- Room Temperature: Store the baked Daisy Cookies in an airtight container at room temperature for up to 1 week. This will keep them fresh and delicious for everyday snacking.
- Fridge: For extended freshness, keep the cookies in the fridge in an airtight container for up to 2 weeks. Just allow them to come to room temperature before serving to enjoy their full flavor.
- Freezer: You can freeze the dough for up to a month. Shape the Daisy Cookies as instructed, freeze them on a tray until firm, then transfer them to a zip-top bag. Bake from frozen, adding a couple of minutes to the baking time.
- Reheating: If you like your cookies warm, simply pop them in a preheated oven at 150°C (300°F) for about 5-7 minutes to reclaim that freshly baked taste before serving.
What to Serve with Daisy Cookies
Indulge in a delightful world of flavors to elevate your cookie experience with treats that add joy and variety to your table.
-
Cold Milk: Milk’s creamy texture and mild flavor beautifully balance the sweetness of the cookies, making it a timeless classic.
-
Hot Chocolate: Rich and warming, a cup of hot chocolate complements the buttery flavors and adds an extra layer of sweetness.
-
Fruit Salad: A refreshing mix of seasonal fruits brings a burst of freshness and a contrasting texture that lightens the sweetness of the cookies.
-
Vanilla Ice Cream: The smooth creaminess of vanilla ice cream pairs perfectly with the chewy texture of Daisy Cookies, making a decadent dessert.
-
Homemade Whipped Cream: Light and airy, a dollop of whipped cream creates a delightful contrast, enhancing every bite of your floral cookies.
-
Tea Party Punch: A fruity punch served chilled can be a vibrant accompaniment for these colorful treats, perfect for gathering and celebrating with loved ones.
-
Chocolate Drizzle: For a touch of something extra, drizzle melted chocolate over the cookies for added richness that will delight chocolate lovers.
-
Decorative Sprinkles: Sprinkle extra Smarties or colorful sprinkles on top alongside or after baking for added whimsy and fun, making them irresistible.
Make Ahead Options
These delightful Daisy Cookies are a perfect choice for busy home cooks looking to save time during the week! You can prepare the cookie dough up to 24 hours in advance by mixing all the ingredients and shaping the balls. Store them in an airtight container in the refrigerator, ensuring they stay fresh and flavorful. Additionally, you can even freeze the dough for up to 1 month: simply shape the cookies and place them in a single layer in the freezer until firm, then transfer to a ziplock bag. When you’re ready to bake, just preheat the oven and bake the cookies directly from the freezer—no need to thaw! This way, you’ll enjoy fresh, warm Daisy Cookies with minimal effort any time you crave a sweet treat.
Expert Tips for Making DAISY COOKIES
-
Chill the Dough: Refrigerating the dough for 30 minutes helps prevent spreading, ensuring your Daisy Cookies keep their beautiful flower shape during baking.
-
Use Quality Ingredients: Fresh butter and flour can drastically improve your cookie’s flavor and texture. Make sure to check expiration dates!
-
Perfectly Preheat: Always preheat your oven to the right temperature; an under-heated oven can lead to cookies that don’t bake evenly.
-
Experiment with Toppings: While Smarties are fun, feel free to customize with colorful sprinkles, chocolate chips, or nuts for a unique twist on your DAISY COOKIES.
-
Monitor Baking Time: Keep an eye on your cookies in the oven; they should be lightly golden at the edges but still soft in the middle for the best texture.
DAISY COOKIES: Delightful Variations to Try!
Get ready to make these treats your own! Here are some fun variations to customize the deliciousness of your Daisy Cookies.
- Sprinkle Party: Swap Smarties for colorful sprinkles for an even more festive look. The vibrant colors will make your cookies shine!
- Nutty Twist: Add chopped nuts like walnuts or pecans to the dough for a satisfying crunch. This adds depth to each bite while making it a bit heartier.
- Extra Flavoring: Incorporate a dash of vanilla or almond extract into the dough for a lovely aromatic boost. It enhances the overall taste and provides a delightful surprise.
- Zesty Delight: Grate some lemon or orange zest into the cookie dough for a refreshing citrus note. This twist complements the sweetness and adds brightness!
- Chocolatey Goodness: Replace Smarties with chocolate chips or chunks for a rich, gooey texture. Dive into these delightful morsels for pure happiness!
- Fruit Fusion: Mix in dried cranberries or raisins for a pop of tartness. This gives the cookies a fun, chewy texture and an unexpected flavor kick.
- Spicy Kick: Add a sprinkle of cinnamon or nutmeg to the dough for a warm and cozy vibe, perfect for the holiday season. It’ll transform your cookies into a delightful seasonal treat!
- Gluten-Free Version: Swap the all-purpose flour for a gluten-free blend, ensuring everyone can enjoy these beauties! Just be sure to check your blend’s baking instructions for best results.
For more delicious treats, don’t miss our Apple Snickerdoodles Cozy recipe, perfect for sharing with friends and family! Enjoy baking and experimenting!
Daisy Cookies Recipe FAQs
What types of butter should I use for Daisy Cookies?
Absolutely! I recommend using unsalted butter for the perfect balance of flavor. Ensure it’s softened before mixing to avoid any lumps, giving you a smooth cookie dough. If you’re in a pinch, you can use margarine, but the taste might differ slightly.
How should I store Daisy Cookies for maximum freshness?
Very well! Store your baked Daisy Cookies in an airtight container at room temperature for up to 1 week. For longer storage, keep them in the fridge for up to 2 weeks. This helps maintain their delightful softness, ready to be enjoyed at a moment’s notice.
Can I freeze the dough for Daisy Cookies? How?
Absolutely, freezing the dough is a fantastic option! After shaping the cookies, place them on a baking tray and freeze until firm, about 1-2 hours. Once firm, transfer the cookies to a zip-top bag, removing as much air as possible. They can be frozen for up to a month! When you’re ready to bake, just pop them in the oven from frozen, adding a couple of minutes to the baking time to ensure they’re cooked through.
What if my Daisy Cookies spread too much during baking?
Not to worry! If your cookies spread excessively, it’s likely that the dough was too warm or not chilled enough. Make sure to chill the dough in the freezer for at least 30 minutes before baking. You can also try adding a bit more flour to the mix, about 1 tablespoon at a time, until you reach a better consistency.
Are there any allergy considerations when making Daisy Cookies?
Yes, definitely! These delightful cookies contain gluten from flour and dairy from butter, making them unsuitable for those with gluten or dairy allergies. For gluten-free options, substitute with a gluten-free flour blend, and for dairy-free, you can use coconut oil or a vegan butter alternative. Always check your ingredient labels to ensure there are no hidden allergens!
Daisy Cookies: Colorful Fun That Kids Will Love to Make!
Ingredients
Equipment
Method
- Preheat the oven to 190°C (375°F) and line a baking tray with parchment paper.
- In a mixing bowl, combine softened butter, flour, and sugar, rubbing together until crumbly.
- Knead the dough on a clean surface for about 2 minutes until smooth.
- Roll small balls of dough, shaping them into flowers and arranging on the tray.
- Flatten each dough ball gently to create petal shapes.
- Press a Smartie into the center of each cookie and chill in the freezer for 30 minutes.
- Bake the cookies for 8-10 minutes until light golden around the edges.
- Allow cookies to cool for a few minutes before transferring to a wire rack to cool completely.
Leave a Reply