
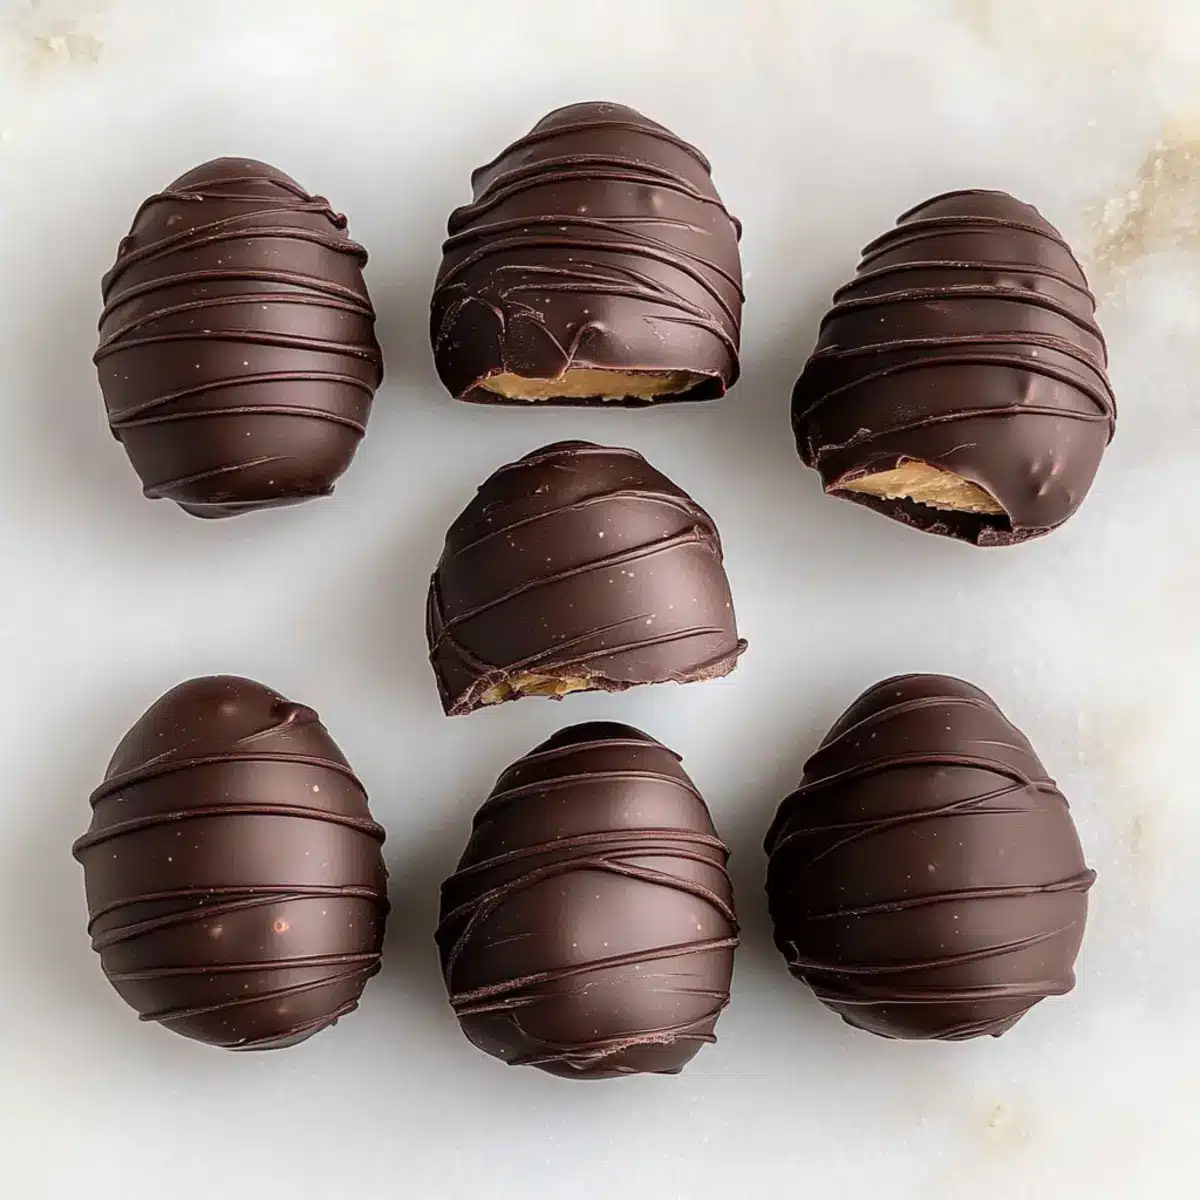
As I rummaged through my pantry in search of something delightful to whip up for Easter, I stumbled upon a jar of creamy peanut butter that immediately ignited my imagination. That’s when I decided to create these No-Bake Chocolate Peanut Butter Eggs, a scrumptious nod to the classic Easter candy! Not only are they an absolute treat for your taste buds, but these delightful goodies are also gluten-free, vegan, and naturally sweetened. The best part? They come together in a flash, making them a hassle-free way to impress friends and family during the festive season. Ready to indulge without the guilt? Let’s dive into making these irresistible Easter Peanut Butter Eggs together!
Why are these Easter Peanut Butter Eggs special?
Decadent, Guilt-Free Treats: These no-bake Chocolate Peanut Butter Eggs deliver all the indulgence without the guilt, being gluten-free and vegan.
Quick & Easy: With just a few simple steps, you can whip these up in no time—perfect for busy holiday preparations!
Irresistible Flavor: The creamy peanut butter filling paired with silky chocolate creates a flavor combination that will have everyone asking for seconds.
Versatile Variations: Want to mix things up? Try incorporating shredded coconut or even almond butter for a unique twist!
Festive Appeal: Ideal for Easter, these treats make a stunning addition to any dessert platter or as a delightful gift. Plus, they’re a healthier option compared to store-bought candies!
Easter Peanut Butter Eggs Ingredients
• Get ready to create something delicious!
For the Filling
- Creamy Peanut Butter – Provides the rich, nutty flavor; using natural peanut butter yields the best texture.
- Blanched Almond Flour – Acts as a binding agent; you can substitute with coconut flour but reduce the amount due to its moisture-absorbing nature.
- Maple Syrup or Honey – Adds sweetness; opt for maple syrup to keep it completely vegan.
- Vanilla Extract – Enhances the overall flavor; make sure to use pure vanilla extract for the best taste.
- Sea Salt – Balances sweetness and enriches the flavor profile.
For the Chocolate Coating
- Semi-Sweet Chocolate Chips – Forms a rich chocolate coating; feel free to use dark chocolate for a more intense flavor.
- Coconut Oil – Aids in melting the chocolate smoothly; if unavailable, substitute with vegetable oil or cocoa butter.
These ingredients combine to create the ultimate Easter Peanut Butter Eggs, a delightful no-bake treat sure to impress your family and friends!
Step‑by‑Step Instructions for Easter Peanut Butter Eggs
Step 1: Prepare the Filling
In a food processor, combine 1 cup of creamy peanut butter, 1 teaspoon of vanilla extract, 1/4 cup of maple syrup, 1 cup of blanched almond flour, and a pinch of sea salt. Pulse until the mixture becomes crumbly yet well combined, typically about 1-2 minutes. The filling should hold together when pressed. This delicious mixture will form the foundation for your Easter Peanut Butter Eggs.
Step 2: Shape Filling
Once your filling is ready, take a portion and roll it into egg-shaped balls, about 1-2 inches long. Alternatively, flatten the mixture and use a cookie cutter to create egg shapes. Place the shaped filling onto a parchment-lined baking sheet. Transfer the baking sheet to the freezer for about 15 minutes, allowing the treats to firm up for easy dipping later.
Step 3: Melt the Chocolate
While the filling is chilling, prepare the chocolate coating. In a microwave-safe bowl, combine 1 cup of semi-sweet chocolate chips and 1 tablespoon of coconut oil. Microwave in 30-second intervals, stirring between each, until the chocolate is completely smooth and glossy, which should take about 1-2 minutes total. Be cautious not to overheat the chocolate for perfect dipping consistency.
Step 4: Dip Eggs in Chocolate
Retrieve the chilled peanut butter eggs from the freezer. Using a fork, carefully dip each egg into the melted chocolate, making sure it is fully coated. Gently tap the fork against the bowl’s edge to let excess chocolate drain away. Place the dipped eggs back onto the parchment-lined sheet for a beautiful finish, and drizzle any remaining chocolate over the tops if desired.
Step 5: Chill and Serve
Once all the eggs are dipped and decorated, place the baking sheet back in the fridge or freezer for another 30 minutes to allow the chocolate coating to set completely. After they are firm, your Easter Peanut Butter Eggs will be ready to serve. Enjoy them at room temperature for the best flavor and texture, perfect for sharing during any festive gathering!

Make Ahead Options
These Easter Peanut Butter Eggs are perfect for meal prep enthusiasts! You can prepare the filling and shape the eggs up to 24 hours in advance. Simply complete steps 1 and 2, then place the shaped filling in an airtight container in the refrigerator to maintain freshness. When you’re ready to finish, just dip the chilled eggs in melted chocolate as outlined in steps 3 through 5. This way, you free up time for other holiday festivities, ensuring that these delightful treats are just as delicious when served. Trust me, a little prep goes a long way in making your celebrations stress-free and enjoyable!
What to Serve with No-Bake Chocolate Peanut Butter Eggs
Imagine indulging in these sweet delights as part of a cozy gathering or a festive celebration—the perfect backdrop for sweet memories!
- Creamy Coconut Rice: This light and fluffy side dish beautifully contrasts the rich chocolate, adding a delightful tropical twist.
- Fresh Fruit Salad: A burst of juicy fruits will brighten the table and offer a refreshing palate cleanser between bites.
- Dark Chocolate Dipped Strawberries: Complement the peanut butter eggs with another chocolate treat, creating an exquisite chocolate experience!
- Salted Caramel Sauce: Drizzling this decadent sauce adds another layer of indulgence, mixing sweet and salty flavors perfectly.
- Iced Coffee or Espresso: These rich beverages complement the creamy texture, creating a warm and inviting atmosphere.
- Vegan Vanilla Ice Cream: Serve chilled alongside the eggs for a delightful dessert duo that satisfies every sweet tooth—what a treat!
- Chocolate Milkshake: Pair with a creamy milkshake to satisfy chocolate cravings while keeping the theme consistent.
- Almond Flour Cookies: A light option that mirrors the nutty taste of the eggs, making it an ideal companion on dessert platters.
Storage Tips for Easter Peanut Butter Eggs
Fridge: Store your Easter Peanut Butter Eggs in an airtight container in the fridge for up to 2 weeks, ensuring they remain fresh and flavorful.
Freezer: For extended storage, freeze the chocolate-coated eggs in a single layer in a freezer-safe container for up to 3 months, preserving their delightful taste and texture.
Thawing: When ready to enjoy, allow the eggs to sit at room temperature for about 15 minutes after removing them from the fridge or freezer to enhance the flavor and texture before serving.
Reheating: These delicious treats are best served chilled or at room temperature; microwaving is not recommended as it can alter their creamy filling consistency.
Easter Peanut Butter Eggs Variations
Feel free to get creative and make these Easter Peanut Butter Eggs truly your own with these delightful twists!
-
Nutty Switch: Use almond butter instead of peanut butter for a deliciously different flavor profile that still satisfies your nutty cravings.
-
Texture Boost: Mix in shredded coconut with the peanut butter filling for a tropical touch that adds chewy texture and flavor.
-
Sugar Swap: Experiment with agave syrup instead of maple syrup for a slightly different sweetness while keeping the treat vegan.
-
Flavor Twist: Add a hint of coffee granules to the filling for a mocha-inspired treat; the combination with chocolate is simply irresistible!
-
Crunch Factor: Fold in crushed graham crackers into the filling for a delightful crunch that will remind you of s’mores.
-
Fruity Addition: Incorporate dried fruit chunks, like cranberries or cherries, into the filling for a sweet fruity surprise in every bite.
-
Spicy Kick: For those who love heat, a pinch of cinnamon or a dash of cayenne pepper in the filling can create an exciting flavor contrast with the chocolate.
-
Healthy Seeds: Add a sprinkle of chia seeds or pumpkin seeds in the mixture for a health boost and a slight crunch; it’s a simple way to pack in some nutrition!
Feel free to also explore pairing these delectable bites with other treats! For instance, serve them alongside a platter of freshly baked Biscuits Honey Butter or a rich bowl of Crockpot Butter Chicken for the main event. Your guests will surely love the variety!
Expert Tips for Easter Peanut Butter Eggs
-
Room Temperature Ingredients: Ensure all ingredients are at room temperature before mixing; this helps achieve a smoother filling that holds together perfectly.
-
Avoid Chocolate Overheating: Stop microwaving the chocolate as soon as it starts to melt. Overheating can cause the chocolate to seize up, leading to a less-than-perfect coating for your Easter Peanut Butter Eggs.
-
Perfect Dipping Technique: Use a fork to dip each egg fully; allowing excess chocolate to drain off creates a beautiful finish. Practice makes perfect!
-
Freezing for Firmness: If your eggs become too soft while shaping, pop them back in the freezer for a few minutes. This makes them easier to dip and maintain their shape.
-
Storage Secrets: Keep these sweet treats fresh by storing them in an airtight container in the fridge for up to 2 weeks. They can also be frozen for up to 3 months!
Easter Peanut Butter Eggs Recipe FAQs
What type of peanut butter should I use for the filling?
Absolutely! For the best flavor and texture, I recommend using natural creamy peanut butter without added sugars or oils. This will give your Easter Peanut Butter Eggs a rich, nutty taste that perfectly complements the chocolate coating.
How do I store leftover Easter Peanut Butter Eggs?
You can store your Easter Peanut Butter Eggs in an airtight container in the fridge for up to 2 weeks. Make sure they are well-sealed to maintain their freshness and prevent them from absorbing any odors from the fridge.
Can I freeze these chocolate peanut butter eggs?
Very! These delightful treats freeze beautifully. To freeze, lay the chocolate-coated eggs in a single layer on a parchment-lined baking sheet and freeze them for about an hour. Once firm, transfer them to a freezer-safe container. They’ll keep well for up to 3 months. Just remember to let them thaw for about 15 minutes at room temperature before serving for the best texture.
What should I do if my chocolate is too thick for dipping?
If your melted chocolate is too thick, simply add a little more coconut oil, one teaspoon at a time, and stir until you achieve a smoother consistency. Be careful not to overheat the chocolate in the microwave, as that can make it seize up. If this happens, try to add a bit of coconut oil to help loosen it back up.
Are these Easter Peanut Butter Eggs suitable for those with allergies?
Yes! These treats are gluten-free and vegan, which makes them suitable for many dietary considerations. However, if you are serving someone with a peanut allergy, feel free to substitute the peanut butter with sunflower seed butter for a nut-free alternative. Always double-check your chocolate chip packaging to ensure it’s free from allergens, too!
Irresistible Easter Peanut Butter Eggs You'll Love to Make
Ingredients
Equipment
Method
- In a food processor, combine creamy peanut butter, vanilla extract, maple syrup, blanched almond flour, and a pinch of sea salt. Pulse until crumbly.
- Shape the mixture into egg-shaped balls or flatten to make egg shapes. Place on a parchment-lined sheet and freeze for 15 minutes.
- In a microwave-safe bowl, combine chocolate chips and coconut oil. Microwave in 30-second intervals until smooth.
- Dip each chilled egg into the melted chocolate, ensuring full coating. Place decorated eggs back on the parchment.
- Chill the eggs in the fridge or freezer for 30 minutes until the chocolate sets. Serve at room temperature.
Leave a Reply