
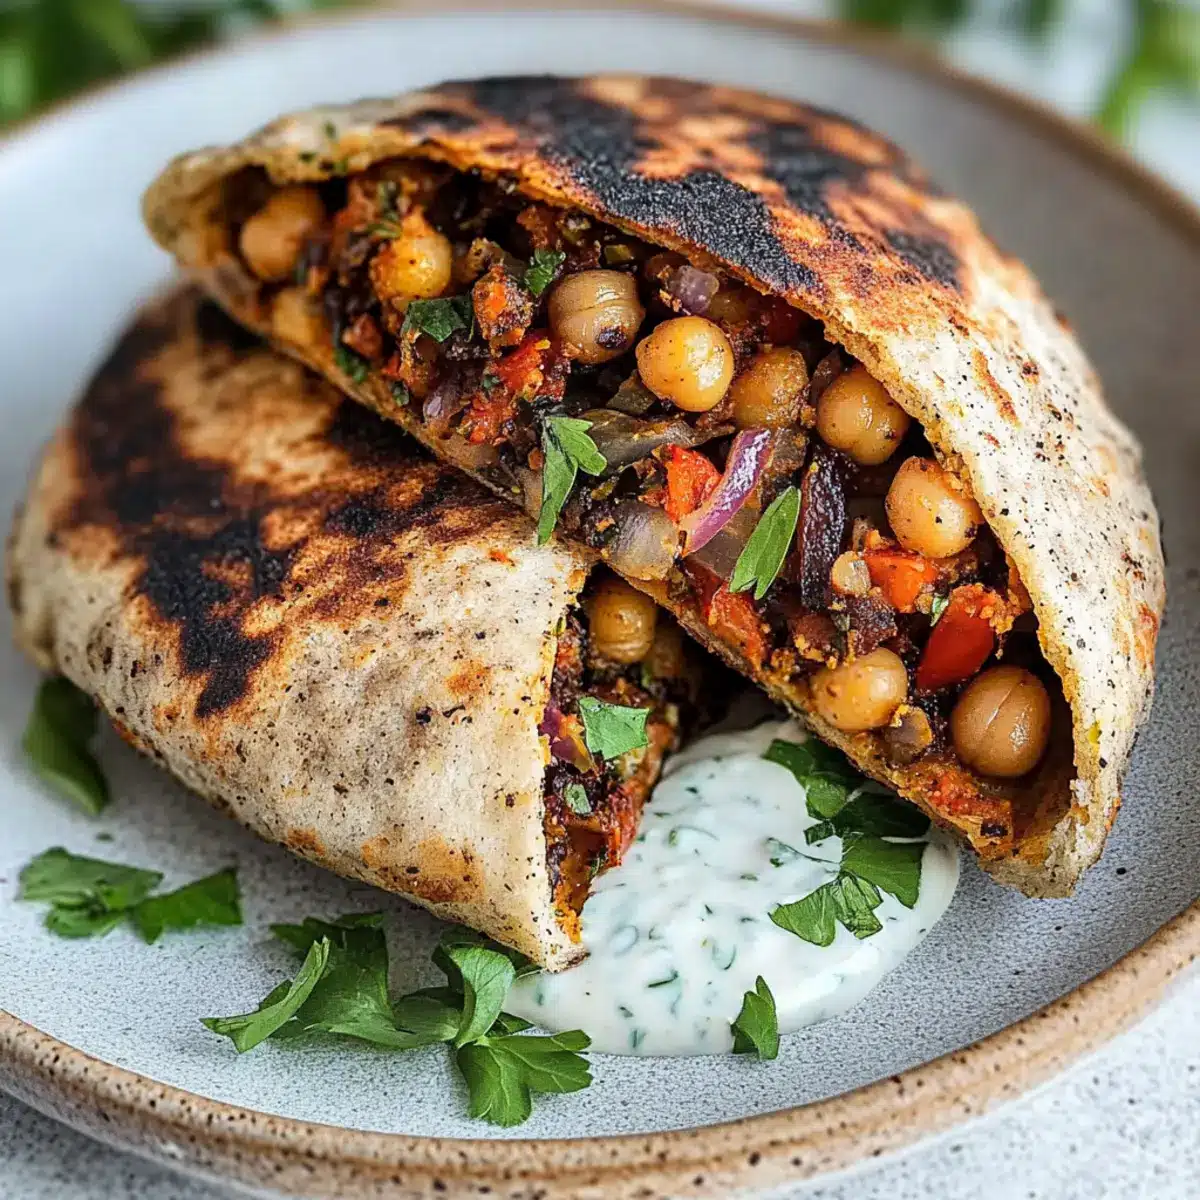
Just as the sun sets over the bustling streets of a Middle Eastern market, aromatic spices fill the air, inviting you to savor a delightful culinary adventure. Enter the Grilled Chickpea Veggie Pita, a dish that effortlessly transports you to vibrant bazaars with every bite. Not only is this recipe a convenient, high-protein meal that aligns beautifully with your budget, but it also allows you to customize it with your favorite veggies for a deliciously unique twist. Packed with fiber and flavor, these crispy grilled pitas serve as the perfect vessel for textured chickpeas spiced with za’atar. Whether you’re in need of a quick lunch or a satisfying dinner that pleases even the pickiest eaters, these pitas are the answer. Are you ready to fill your kitchen with enticing scents and warm flavors? Let’s dive into this flavorful experience!
Why You’ll Love Grilled Chickpea Veggie Pitas
Simplicity at Its Finest: The recipe features an easy-to-follow method that yields delicious results with minimal effort, perfect for even the busiest of days.
Rich Flavor Explosion: With za’atar seasoning blending with hearty chickpeas and vibrant veggies, every bite is a delightful taste experience reminiscent of a Middle Eastern market.
Customizable Delight: Mix and match your favorite vegetables, or try alternatives like ground tempeh for unique variations! Don’t forget to check out my Hawaiian Roll Grilled Cheese for another twist on flavors.
Budget-Friendly Nutrition: Packed with protein and fiber, these pitas are not only healthy but also easy on the wallet!
Crowd-Pleaser: Everyone will love this comforting dish, making it ideal for dinner parties or a casual meal at home. Serve alongside a light herby salad or crispy tofu for added delight!
Grilled Chickpea Veggie Pita Ingredients
For the Filling
• Chickpeas – A high-protein and fiber-packed base that forms the hearty foundation of your filling.
• Yellow Onion – Adds aromatic flavor; can be replaced with shallots for a sweeter taste profile.
• Garlic – Enhances flavor; adjust quantity according to your preference for a punchier bite.
• Bell Pepper – Optional for added crunch and sweetness; substitute with zucchini for a milder flavor.
• Mushrooms – Boosts umami depth; can be omitted for a lighter filling if desired.
• Tomato Paste – Provides richness and depth of flavor; use canned paste for convenience, or leave out for a less tomato-forward taste.
• Za’atar – A Middle Eastern spice blend that infuses signature flavor; substitute with a mix of oregano and sesame seeds if necessary.
• Cumin, Coriander, Fennel Seeds – These spices bring warmth and complexity; adjust based on your taste preferences.
• Parsley & Cilantro – Fresh herbs that brighten the filling; feel free to substitute with other herbs like dill or mint for a twist.
For the Pitas
• Whole Grain Pitas – Serve as the hearty vessel for your filling; gluten-free wraps can be used as a substitution.
• Plant-Based Greek Yogurt – Adds creaminess and protein; can be swapped with tahini for a nut-free alternative.
These vibrant ingredients come together to create the best flavor-packed Grilled Chickpea Veggie Pita that you’ll love to make!
Step‑by‑Step Instructions for Grilled Chickpea Veggie Pita
Step 1: Mash the Chickpeas
Begin by draining and rinsing a can of chickpeas. In a mixing bowl, roughly mash the chickpeas with a fork or potato masher, leaving some chunks for texture. This should take about 2-3 minutes. The beginning of your Grilled Chickpea Veggie Pita is filled with the nutty essence of chickpeas, setting a hearty foundation for your filling.
Step 2: Sauté the Aromatics
Heat a tablespoon of oil in a skillet over medium heat. Once hot, add the chopped yellow onion, along with optional bell pepper and mushrooms. Sauté these ingredients for about 2-3 minutes, until the onion turns translucent and softens, and moisture is released, infusing the air with a lovely aromatic fragrance.
Step 3: Add Garlic and Tomato Paste
Next, stir in minced garlic and cook everything together for an additional 1 minute until fragrant. Once the garlic is sizzling, mix in the chickpeas and a tablespoon of tomato paste, along with your soy sauce and a sprinkle of cumin, coriander, and za’atar. Cook this mixture for another 2-3 minutes, allowing the flavors to meld beautifully together.
Step 4: Mix in Fresh Herbs
Remove the skillet from the heat and fold in chopped parsley and cilantro. Taste your filling for seasoning, adjusting with salt, pepper, or more spices as necessary. The filling for your Grilled Chickpea Veggie Pita should burst with flavor and vibrant green color, hinting at the deliciousness to come.
Step 5: Preheat the Griddle
While prepping the filling, preheat your griddle or grill pan over medium-high heat. Lightly brush the whole grain pitas with oil. This will help achieve a perfectly crispy exterior. Keep an eye on the temperature, making sure it’s hot enough for grilling but not smoking.
Step 6: Stuff and Grill the Pitas
Stuff each pita generously with the warm chickpea filling, being careful not to overstuff to prevent tearing. Place the stuffed pitas seam-side down on the griddle. Grill for about 3-4 minutes, press gently to mark, then flip and cook for another 2-3 minutes until both sides are nicely toasted and crispy.
Step 7: Prepare the Yogurt Sauce
In a small bowl, whisk together plant-based Greek yogurt with a pinch of salt, pepper, and optional herbs. Adjust the seasoning according to your taste preferences. This creamy sauce will serve as a delightful cooling contrast to your warm, spiced Grilled Chickpea Veggie Pitas.
Step 8: Serve Warm
Carefully remove the grilled pitas from the heat and serve them warm with the yogurt sauce on the side for dipping. These pitas are perfect for a quick lunch or cozy dinner, and can be enjoyed fresh or stored for later. Make your meal time a flavorful experience!
Expert Tips for Grilled Chickpea Veggie Pita
-
Avoid Overstuffing: Be careful not to overfill the pitas, as this can lead to tearing. A balanced amount helps maintain the integrity of the Grilled Chickpea Veggie Pita.
-
Customize Your Veggies: Feel free to mix and match vegetables based on your taste preferences. Using seasonal produce can elevate the flavor and freshness of the filling.
-
Perfect Grilling Temperature: Make sure your griddle is hot enough but not smoking. This ensures the pitas get that perfect crispy exterior while remaining warm inside.
-
Taste as You Go: Always taste the filling before stuffing the pitas. Adjust the seasoning to your liking; it’s all about achieving that delightful flavor burst.
-
Store Separately: To maintain the texture, store the chickpea filling separately from the pitas. It can be refrigerated for up to 5 days, making meal prep a breeze!
How to Store and Freeze Grilled Chickpea Veggie Pitas
Room Temperature: Store grilled pitas at room temperature in a clean, breathable cloth for up to 2 hours; however, they are best enjoyed fresh.
Fridge: Keep leftover chickpea filling in an airtight container for up to 5 days to maintain its flavor and texture. Store the pitas separately to prevent moisture.
Freezer: For longer storage, freeze the chickpea filling in portion-sized bags, removing excess air. It will last up to 2 months; thaw before reheating.
Reheating: Reheat the filling in a skillet over medium heat or microwave until warmed through. For pitas, lightly grill or toast until warm and crispy for a delicious experience with your Grilled Chickpea Veggie Pita!
Grilled Chickpea Veggie Pita Variations
Feel free to get creative and customize your grilled chickpea veggie pita to match your taste preferences and dietary needs!
- Dairy-Free: Replace plant-based Greek yogurt with a smooth tahini sauce for a nut-free creamy option.
- Extra Crunch: Add shredded carrots or cucumber for a refreshing crunch that brightens your filling.
- Spicy Kick: Stir in diced jalapeños or a sprinkle of chili flakes for a zesty heat that elevates every bite.
- Roasted Veggies: Roast bell peppers, zucchini, or asparagus before adding to your filling for a sweeter, caramelized flavor.
- Smashed Avocado: A layer of creamy avocado spread inside each pita adds a rich texture and heart-healthy fats.
- Herb Explosion: Toss in a mix of fresh herbs like mint or dill for a burst of refreshing flavor that enhances the Middle Eastern inspiration.
- Flavor Boost: Experiment with flavored pitas, such as spinach or herb-infused, to add an exciting twist to your meal. Enhance with a side of my scrumptious Crispy Blueberry Grilled Cheese!
- Protein Power: Swap chickpeas for ground tempeh or lentils for additional protein sources, catering to different dietary preferences.
The possibilities are endless, ensuring each meal is a delightful adventure!
Make Ahead Options
These Grilled Chickpea Veggie Pitas are perfect for meal prep enthusiasts who crave a quick, homemade meal on busy days! You can prepare the chickpea filling up to 3 days in advance, allowing the flavors to meld beautifully. Simply sauté the chickpeas and vegetables as instructed, then let the filling cool before storing it in an airtight container in the refrigerator. For maintaining quality, keep your pitas separate from the filling to prevent them from becoming soggy. When you’re ready to enjoy, simply stuff the grilled chickpea filling into the pitas, grill them for a crispy finish, and serve warm with your yogurt sauce for a satisfying meal any day of the week!
What to Serve with Grilled Chickpea Veggie Pita
Elevate your meal experience with delightful accompaniments that enhance the flavors and textures of your grilled pitas.
- Crispy Herbed Salad: A light mix of leafy greens with fresh herbs complements the pitas and adds a refreshing crunch.
- Creamy Tahini Dressing: A drizzle of tahini dressing brings a nutty creaminess that balances the spices of the chickpea filling beautifully.
- Roasted Sweet Potatoes: The sweetness of roasted sweet potatoes provides a lovely contrast to the savory pitas, offering a hearty side.
- Minted Yogurt Dip: A cool, minty yogurt dip enhances the Mediterranean essence and pairs beautifully with each bite of filling.
- Spicy Lentil Soup: A bowl of warm, spicy lentil soup makes for a comforting pairing, perfect for dipping your pitas.
- Hummus Trio: Serve with a variety of hummus flavors like roasted red pepper, garlic, and classic for a rich, flavorful snacking experience.
- Cucumber and Tomato Salad: Fresh chopped cucumber and tomatoes with a zingy dressing create a light, bright side that uplifts the meal.
- Chilled Sparkling Lemonade: Beat the heat with a refreshing sparkling lemonade that complements the spices and adds a zesty twist.
Grilled Chickpea Veggie Pita Recipe FAQs
How do I choose ripe chickpeas?
When selecting chickpeas, look for those that are firm, pale, and free from dark spots. If using canned chickpeas, opt for high-quality brands that are packed in water and salt, avoiding those with additives. For dried chickpeas, soak them overnight for optimal texture and flavor.
What’s the best way to store leftover chickpea filling?
Store leftover chickpea filling in an airtight container in the refrigerator for up to 5 days. To maintain the texture, keep the filling separate from the pitas. You can easily reheat the filling in a skillet over medium heat or in the microwave when ready to enjoy again.
Can I freeze the chickpea filling?
Absolutely! To freeze the chickpea filling, place it in portion-sized freezer bags, removing excess air to prevent freezer burn. It will keep well for up to 2 months. When you’re ready to use it, simply thaw it in the fridge overnight before reheating.
What should I do if my pitas tear while grilling?
If your pitas tear, don’t worry; this can sometimes happen if they are overstuffed. To avoid this, use a balanced amount of filling. If you need a quick fix, try using a toothpick to hold them together while grilling. Additionally, make sure the grill isn’t too hot to avoid unnecessary stress on the pita.
Are there any dietary considerations for this recipe?
Yes! This Grilled Chickpea Veggie Pita is vegan; however, depending on the ingredients you choose (like the yogurt sauce), be mindful of any allergies (such as to soy in the sauce) or preferences. If you have a nut allergy, using tahini as a yogurt substitute is a great nut-free alternative!
Grilled Chickpea Veggie Pita: A Flavorful Vegan Breakthrough
Ingredients
Equipment
Method
- Begin by draining and rinsing a can of chickpeas. In a mixing bowl, roughly mash the chickpeas with a fork or potato masher.
- Heat a tablespoon of oil in a skillet over medium heat. Add the chopped yellow onion, optional bell pepper, and mushrooms. Sauté for about 2-3 minutes.
- Stir in minced garlic and cook for an additional 1 minute. Mix in the chickpeas and a tablespoon of tomato paste, along with spices.
- Remove the skillet from heat and fold in chopped parsley and cilantro. Adjust seasoning.
- Preheat your griddle over medium-high heat. Lightly brush the whole grain pitas with oil.
- Stuff each pita generously with the chickpea filling. Grill for about 3-4 minutes on each side.
- In a small bowl, whisk together plant-based Greek yogurt with salt, pepper, and optional herbs.
- Serve warm with the yogurt sauce on the side for dipping.
Leave a Reply