
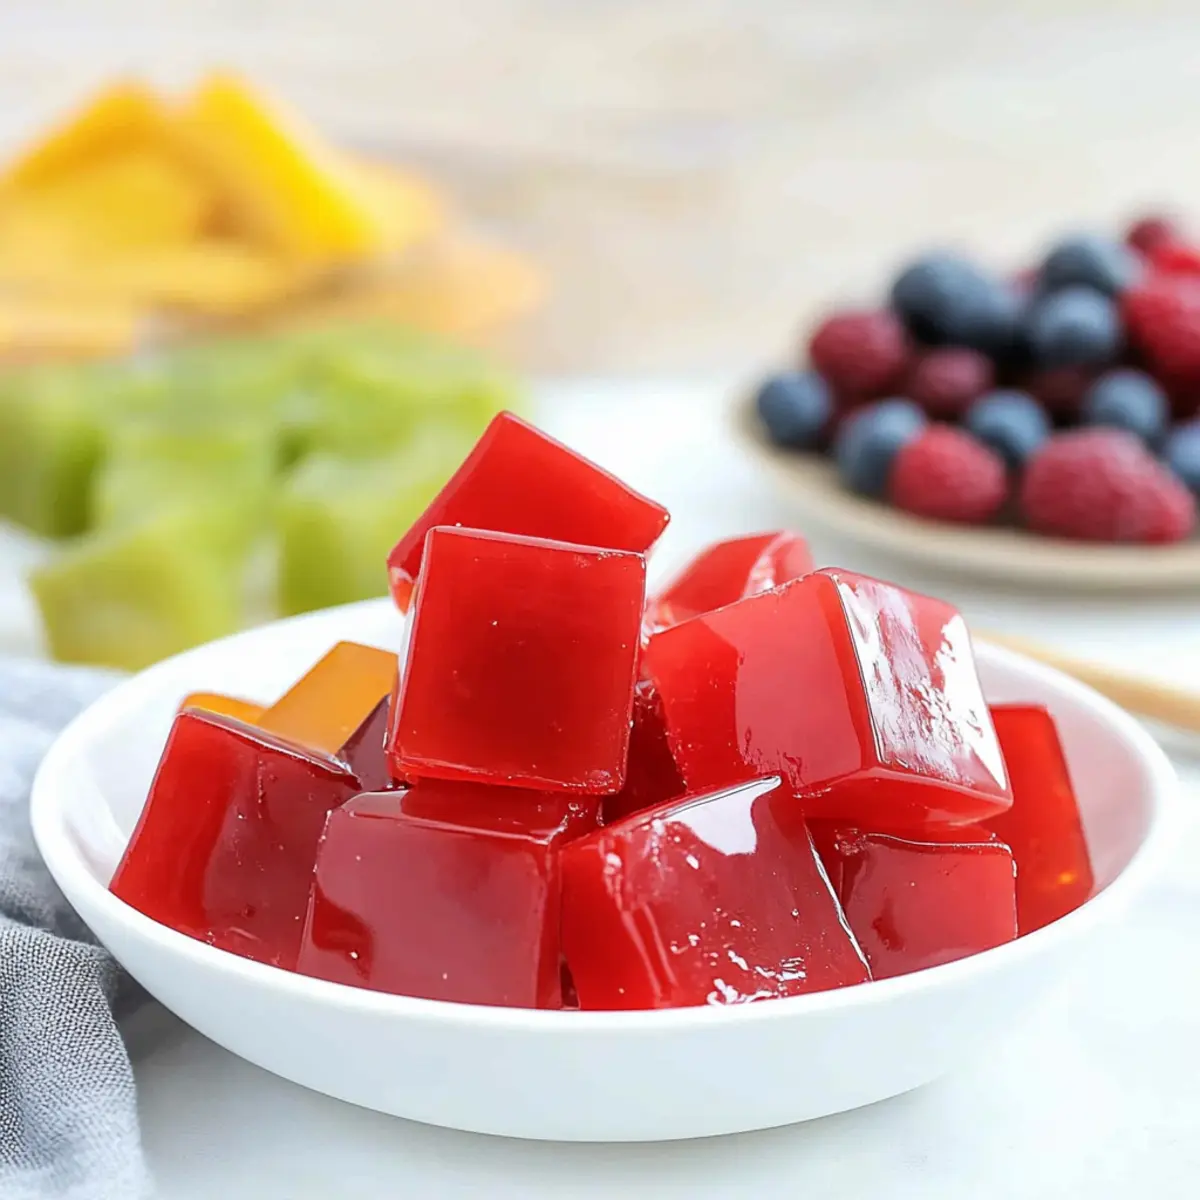
The jiggly magic of homemade jello can transport me back to carefree childhood days, where dessert was a source of pure joy. This Healthy Homemade Jello, made from 100% fruit juice, brings that nostalgia to your kitchen in a nutritious way. With just 15 minutes of prep plus some chilling time, you can create a deliciously satisfying treat that’s not just kid-friendly but guilt-free too! Unlike store-bought versions laden with artificial ingredients, this vibrant dessert offers a refreshing and naturally sweet experience for everyone. Plus, it’s gluten-free, making it an excellent option for gatherings or everyday snacks. Ready to impress your loved ones while delighting your taste buds? Let’s dive into making this delightful treat together!
Why Make Homemade Jello Today?
Wholesome goodness shines through! This Healthy Homemade Jello, crafted from 100% fruit juice, offers a delicious alternative to overly sweet store-bought options. Quick to prepare, you can whip it up in just 15 minutes, freeing your time for family fun. Kid-friendly and appealing, it’s a guaranteed hit for children and adults alike. Versatile flavors mean you can experiment with your favorites, perhaps like in our Jalapeno Peach Chicken dish! Lastly, festive and fun, serve it at parties for a treat everyone will remember. Ready to bring joy to your dessert table?
Homemade Jello Ingredients
For the Base
• 100% Fruit Juice – This is the main ingredient for your jello; any flavor works well, but avoid pineapple to prevent a strange texture.
• Gelatin Powder – The essential setting agent; I recommend brands like Knox or Vital Proteins for best results.
For Flavor Variations
• Additional Juices – Get creative by mixing flavors like cherry, pomegranate, or mango to tailor the jello to your taste.
• Food Coloring (optional) – If you want a more vibrant look, add a few drops of natural food coloring, keeping it wholesome!
With these simple items, you’re ready to make delightful homemade jello that everyone will love!
Step‑by‑Step Instructions for Healthy Homemade Jello
Step 1: Prepare the Gelatin Mixture
Start by measuring 2 cups of your chosen 100% fruit juice into a mixing bowl. Evenly sprinkle 2 tablespoons of gelatin powder over the juice and let it sit for 5 minutes. This process, called blooming, allows the gelatin to soften and ensures a smooth texture in your Healthy Homemade Jello.
Step 2: Heat the Remaining Juice
While the gelatin is blooming, pour the remaining 2 cups of fruit juice into a pot and heat it over medium-high heat. Bring the juice to a gentle boil; you’ll know it’s ready when it starts bubbling vigorously. This hot juice will activate the gelatin and help the jello set perfectly.
Step 3: Combine the Mixtures
Once the juice is boiling, carefully pour it into the bowl containing the bloomed gelatin. Use a whisk to stir the mixture thoroughly until the gelatin is completely dissolved. The blended colors will create a vibrant liquid, signaling you’re on your way to delicious Healthy Homemade Jello.
Step 4: Transfer to a Baking Pan
Take a 9×12 baking pan and pour your jello mixture into it, spreading evenly. Give it a gentle shake to eliminate any air bubbles that may have formed. This step helps ensure that your jello sets uniformly, creating that delightful wobbly texture everyone loves.
Step 5: Chill Until Set
Place the pan in the refrigerator and let the jello chill for at least 2 hours. During this time, the mixture will firm up and take on its signature jiggle. You’ll know it’s ready when the surface is firm to the touch, signaling success in your Healthy Homemade Jello-making journey.
Step 6: Cut and Serve
Once set, remove the pan from the fridge and cut the jello into cubes or use cookie cutters for fun shapes. This adds a playful touch, particularly enjoyable for kids. Serve them in individual cups or on a platter to share at gatherings—everyone will be delighted by your healthy treat!
Step 7: Store Leftovers
If you have any jello left over, store it in an airtight container in the refrigerator. The Healthy Homemade Jello can last for up to a week, so you can enjoy this guilt-free dessert anytime! Just remember to keep it chilled to maintain its delightful texture and freshness.
What to Serve with Healthy Homemade Jello
This delightful dessert pairs perfectly with a variety of sides and drinks that complement its vibrant flavors and light, refreshing texture.
-
Whipped Coconut Cream: A dollop of this dairy-free topping adds a rich, creamy contrast to the jello’s bounce; it’s a match made in dessert heaven!
-
Fresh Fruit Salad: A colorful mix of seasonal fruits brings a fresh, juicy element to the plate, enhancing the natural fruitiness of the jello.
-
Granola Crumble: The crunch of granola introduces a delightful texture alongside the jiggly treat, making every bite an exciting experience.
-
Chocolate Dipping Sauce: Drizzling warm chocolate sauce creates a scrumptious pairing, with a sweet indulgence that elevates your healthy jello to new heights.
-
Sparkling Water with Lime: This effervescent drink is both refreshing and light, making it a perfect palate cleanser while enjoying your jello.
-
Mini Cheesecake Bites: Rich and creamy cheesecakes pair beautifully with the fruity jello, adding a luxurious feel to your dessert table.
-
Herbal Iced Tea: A soothing sip of herbal tea balances sweetness, providing a delightful contrast that keeps your taste buds intrigued.
-
Cheese Platter: Combining salty cheeses like goat cheese or feta offers a new flavor dimension, making it an unexpected yet delightful accompaniment.
-
Ice Cream Floats: Combining jello with ice cream in drinks creates a fun, nostalgic twist perfect for gatherings or playful family meals.
Now that you have some fun ideas, let your creativity shine while serving up this delightful homemade jello treat!
Storage Tips for Homemade Jello
Fridge: Store your Healthy Homemade Jello in an airtight container in the refrigerator for up to a week. This keeps it fresh and ready for snacking!
Cut Shapes: If you’ve used cookie cutters, remember to store them carefully to maintain their fun shapes. Keep the cut pieces in a single layer to prevent sticking.
Freezer: While not ideal, you can freeze Homemade Jello for up to a month. Just remember, texture may change slightly after thawing, becoming less firm.
Reheating: There’s no need to reheat jello. Simply enjoy it cold straight from the fridge, perfect for a refreshing snack or dessert!
Expert Tips for Homemade Jello
• Gelatin Quality: Use high-quality gelatin like Knox or Vital Proteins for the best texture. Avoid generic brands, as they may not set properly.
• Juice Variety: Experiment with different 100% fruit juices; however, steer clear of pineapple to maintain the ideal jello consistency.
• Extra Firmness: If you prefer a firmer jello, simply double the amount of gelatin used. This tip ensures a delightful wobble without losing that fun jiggly texture.
• Chill Time: Don’t rush the chilling process! Allow at least 2 hours for your Homemade Jello to set completely. Waiting will result in a satisfying firm jello.
• Creative Shapes: Use cookie cutters to cut your jello into fun shapes. This adds a playful element, especially for kids, making it even more appealing!
Make Ahead Options
These Healthy Homemade Jello treats are a fantastic choice for busy weeknights and can be made ahead to streamline your meal planning. You can prepare the jello mixture up to 24 hours in advance before chilling, saving you precious time. Simply follow the first three steps of the recipe, allowing the gelatin to bloom and combining it with the hot juice. Pour the mixture into your baking pan and refrigerate it, covering it tightly to maintain its texture. When you’re ready to enjoy, simply cut the jello into cubes or fun shapes for a delightful treat. This way, you’ll have a wholesome dessert ready for your family with minimal effort!
Homemade Jello Variations & Substitutions
Feel free to play around and customize your Healthy Homemade Jello with these delightful twists!
-
Fruit Mix: Mix juices together like apple and pomegranate for a unique flavor blend. The combination brings refreshing tartness to your dessert.
-
Herb-Infused: Add fresh mint leaves or basil to your juice before heating for an aromatic twist. This gives a surprising layer of flavor that compliments fruity notes beautifully!
-
Sweetener Option: Swap sugar for honey or maple syrup to sweeten your jello naturally. This adds a hint of caramel richness that kids will love.
-
Dairy-Free: For a creamier texture, consider incorporating coconut milk with the juice. This tropical addition makes it a refreshing treat ideal for warm days, reminiscent of summer.
-
Layered Jello: Pour one color and allow it to set slightly before adding another. This technique not only looks stunning but creates an exciting multi-flavor experience too!
-
Spicy Touch: Toss in a hint of cayenne pepper for a surprising kick. This contrast elevates the fruity sweetness, making each bite an adventure!
-
Sugar-Free Alternatives: Use unsweetened juice and alternative sweeteners to create a low-calorie version of this jello. A great choice for those keeping an eye on their sugar intake!
-
From Jello to Slush: Blend the set jello with some ice for a slushy treat perfect for hot days. Serve with a fun straw for added flair, just like the vibrant slushies from your childhood.
With endless possibilities, I hope you find joy in experimenting with these variations, bringing even more fun to your dessert-making adventures! And if you’re looking for more delicious family favorites, don’t miss my Crack Burgers Homemade recipe for a hearty meal or try the flavorful Jalapeno Peach Chicken for a dinner that pairs perfectly with your jello dessert!
Healthy Homemade Jello Recipe FAQs
What type of fruit juice should I use for the jello?
Absolutely! For the best results, use any 100% fruit juice, but avoid pineapple. It’s essential to choose juices without added sugars or artificial ingredients for that authentic taste and texture.
How long can I store homemade jello in the refrigerator?
Very! You can keep your Healthy Homemade Jello in an airtight container in the refrigerator for up to 7 days. Make sure to keep it sealed to maintain freshness and vibrancy!
Can I freeze homemade jello?
The more the merrier! While you can freeze your Healthy Homemade Jello for up to a month, be mindful that the texture may change upon thawing. To freeze, cut the jello into cubes, place them in an airtight container, and label with the date for easy tracking.
What should I do if my jello doesn’t set properly?
No worries! If your Healthy Homemade Jello isn’t setting as expected, this might be due to insufficient gelatin. Simply remelt the jello with a touch of boiling fruit juice, add an extra tablespoon of gelatin, and let it bloom again before pouring it back into the pan to set.
Is homemade jello safe for kids and those with food allergies?
Absolutely! This Healthy Homemade Jello is made from 100% fruit juice and gelatin, making it gluten-free and suitable for kids. However, be mindful of any specific allergies to the juice you choose; always check labels for any potential allergens.
Delicious Homemade Jello: Wholesome & Fun for Everyone
Ingredients
Equipment
Method
- Prepare the Gelatin Mixture: Measure 2 cups of fruit juice into a mixing bowl. Sprinkle 2 tablespoons of gelatin powder over the juice and let it sit for 5 minutes.
- Heat the Remaining Juice: Pour 2 cups of fruit juice into a pot and heat over medium-high heat until boiling.
- Combine the Mixtures: Pour the boiling juice into the bowl with bloomed gelatin and whisk until dissolved.
- Transfer to a Baking Pan: Pour the jello mixture into a 9x12 baking pan, spreading evenly and shaking lightly to remove air bubbles.
- Chill Until Set: Refrigerate the pan for at least 2 hours until the jello is firm to the touch.
- Cut and Serve: Cut the jello into cubes or fun shapes using cookie cutters and serve.
- Store Leftovers: Store in an airtight container in the refrigerator for up to a week.
Leave a Reply