
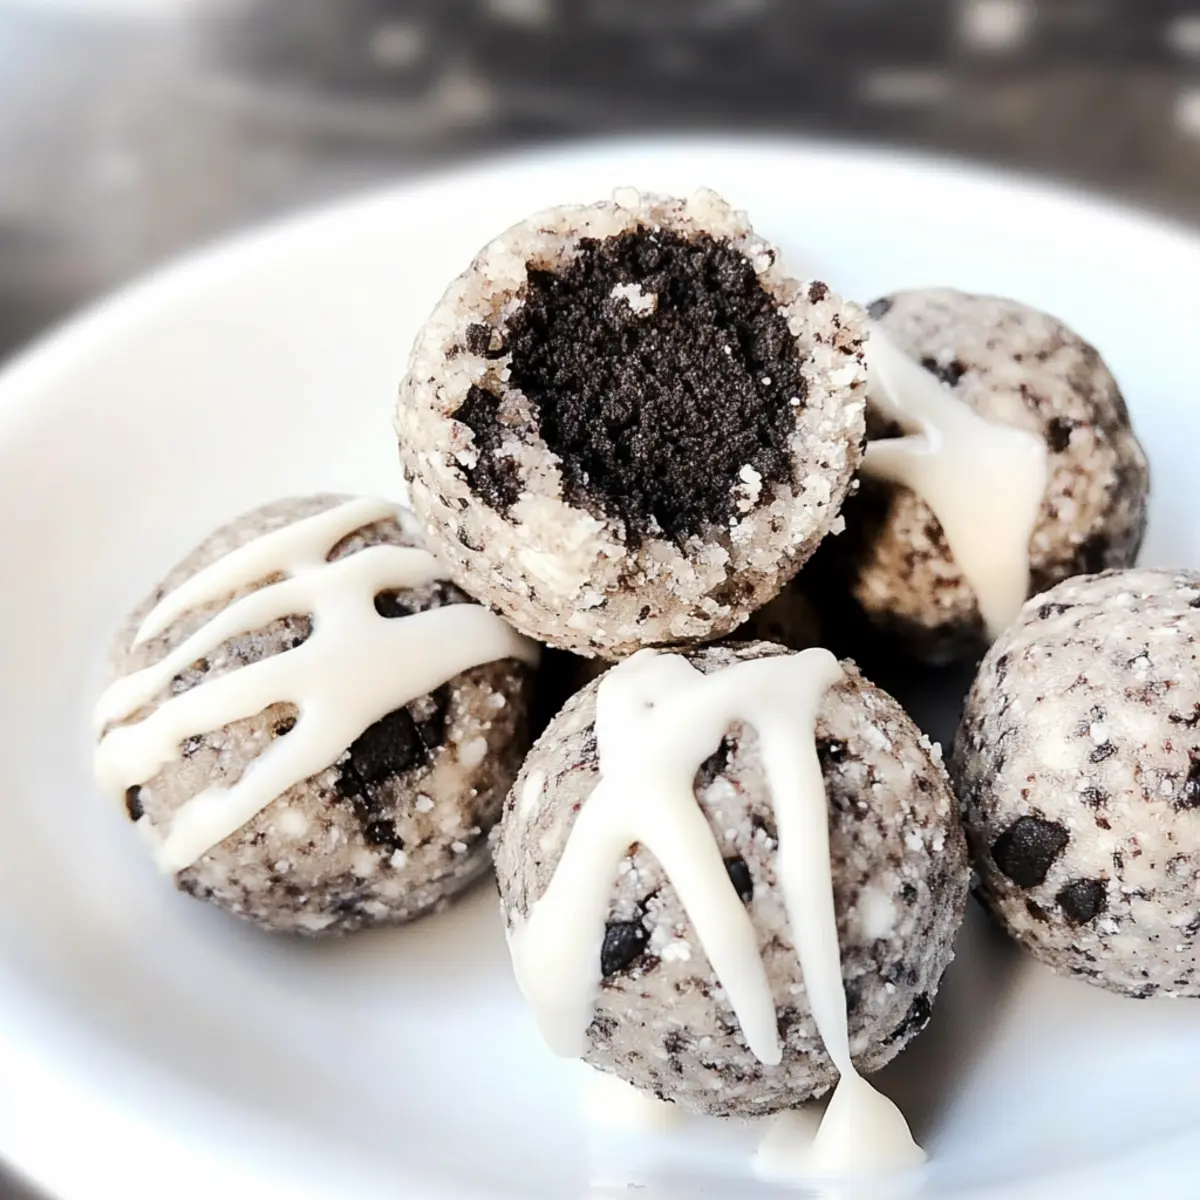
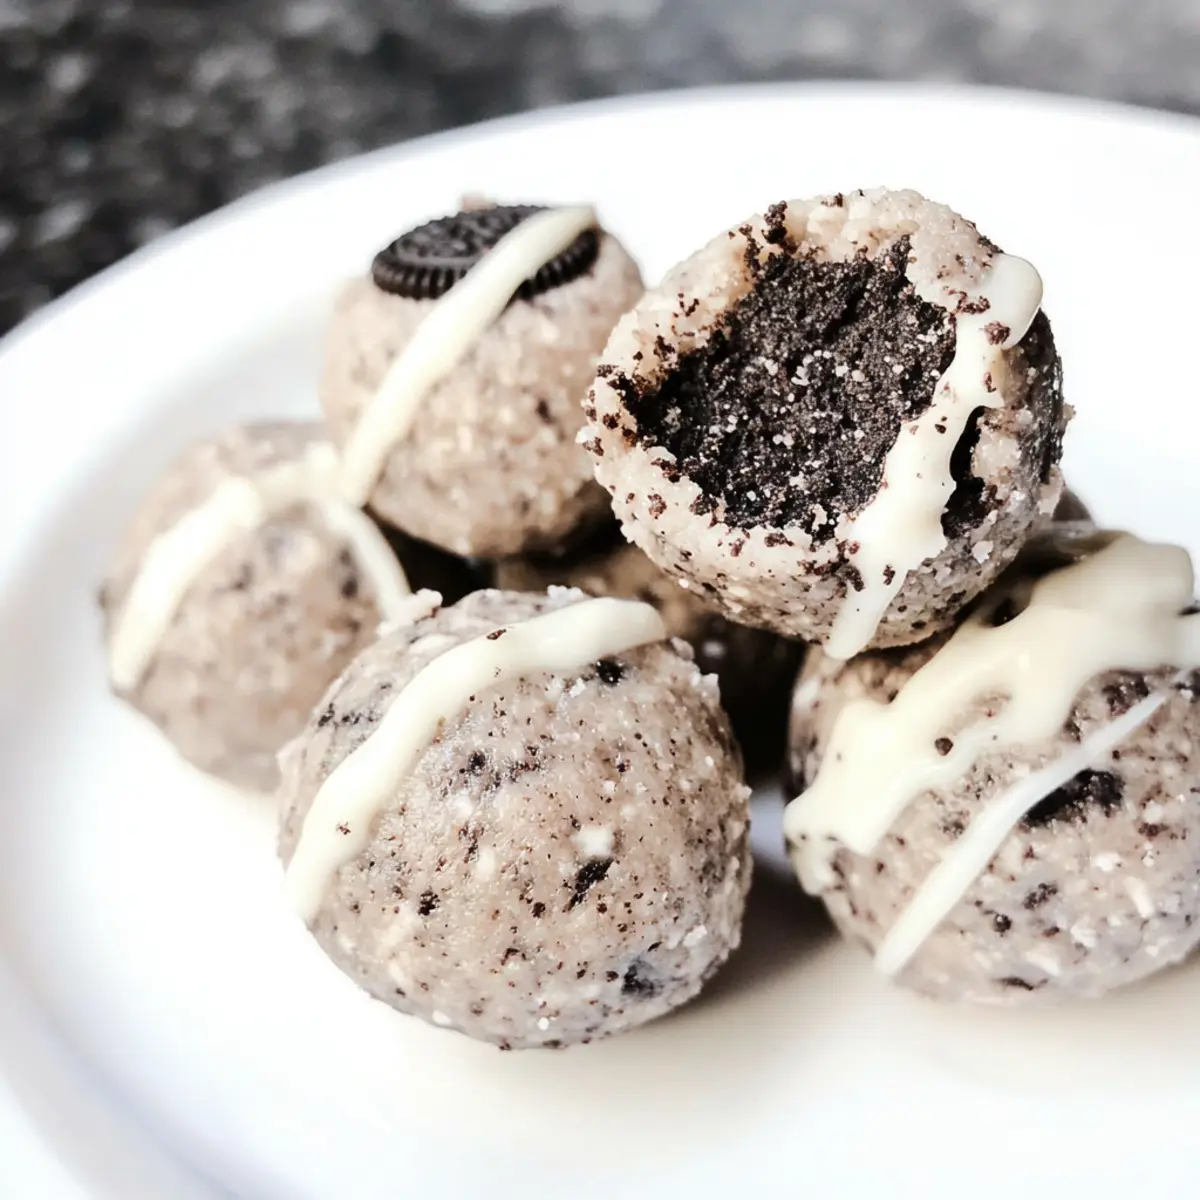
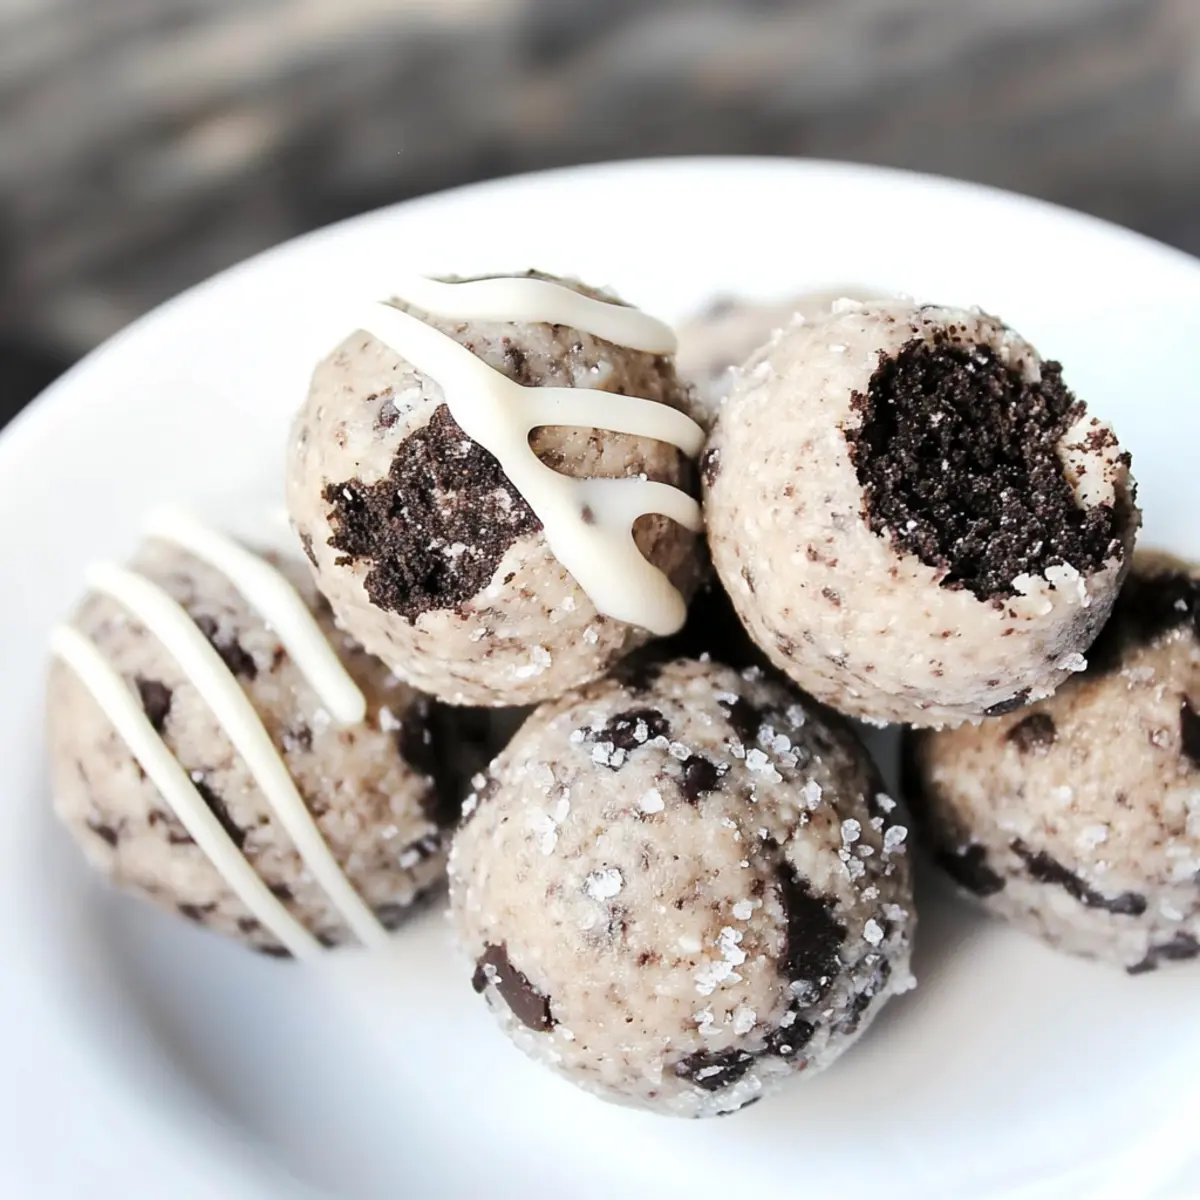
“Who says healthy snacks can’t be a little indulgent?” I found myself thinking as I pulled together some ingredients in my kitchen. Enter the delightful world of Oreo Protein Balls—an irresistible blend of creamy and crunchy, bringing the nostalgic taste of Oreos into the realm of nutritious snacking. With just six simple ingredients, these gluten-free, high-protein no-bake bites come together in a flash, making them the perfect solution for busy days when sweet cravings strike. Besides being a guilt-free treat, they offer quick prep and are freezer-friendly, enabling you to satisfy your snack urges anytime. So, why not give yourself the comfort of a classic cookie in a power-packed ball? Let’s dive into this deliciously easy recipe and discover your new favorite snack!
Why Are Oreo Protein Balls So Loved?
Deliciously Familiar: The iconic flavor of Oreos is perfectly captured in these protein balls, making them irresistible for any cookie lover.
Nutritious Treat: Packed with protein and made gluten-free, they meet your snack cravings without the guilt.
Quick and Easy: Whip them up in just 10 minutes using only six simple ingredients—ideal for busy lifestyles!
Versatile Options: Customize with different proteins or cookie substitutes for a unique twist. If you’re looking for other fun snacks, check out these delightful Jack Skellington Oreo pops or energizing Meatballs in Lemon Sauce.
Crowd-Pleaser: With their creamy texture and crunchy bits, these balls are perfect for gatherings or as a post-workout pick-me-up.
Oreo Protein Balls Ingredients
• These simple ingredients give you a deliciously satisfying and nutritious treat!
For the Protein Base
- Vanilla Protein Powder – Provides protein to fuel your body; can substitute with whey or vegan protein powder.
- Coconut Flour – Adds texture and absorbs moisture; almond flour can be substituted, but may yield a softer texture.
For Sweetness
- Monk Fruit Sweetener – Sweetens the mixture, feel free to adjust or skip for a less sweet option.
For Creaminess
- Cream Cheese – Binds the ingredients together and gives a creamy texture; low-fat or vegan cream cheese work as alternatives.
For the Classic Flavor
- Oreo Cookies – Offers the beloved Oreo taste; be sure they’re gluten-free if needed.
Optional Topping
- White Chocolate Chips – Adds sweetness and a decorative touch; can swap for dark chocolate chips or omit entirely.
Step‑by‑Step Instructions for Oreo Protein Balls
Step 1: Chop Oreos
Begin by finely chopping your Oreo cookies, aiming for a mixture of both fine crumbs and larger chunks to enhance texture. Using a food processor can make this task easier. Aim for about 1 to 2 minutes of pulsing, until you achieve the desired consistency. Set the chopped Oreos aside and reach for a mixing bowl to prepare the dry ingredients.
Step 2: Combine Dry Ingredients
In a large mixing bowl, combine the vanilla protein powder, coconut flour, and monk fruit sweetener. Whisk them together until well blended; this should take about 1 minute. The mixture should look uniform and slightly fluffy. This step lays the groundwork for your Oreo Protein Balls, ensuring they have the right balance of flavor and texture.
Step 3: Add Cream Cheese and Oreos
Next, add the softened cream cheese and the chopped Oreo cookies to the bowl with your dry ingredients. Using a spatula or your hands, mix everything together until fully integrated. This will take around 2-3 minutes, and you’re looking for a dough-like consistency that is sticky but easy to shape. If the mixture feels too dry, add a splash of almond milk.
Step 4: Adjust Texture
If your mixture appears too soft and sticky, gradually incorporate a bit more coconut flour. On the flip side, if it feels overly thick, add a little almond milk to reach your desired consistency. This is about finding balance; it should hold together well yet remain soft enough to easily shape. Take a moment to ensure everything is well-mixed and ready for the next step.
Step 5: Shape the Balls
Using your hands, scoop out tablespoon-sized portions of the mixture and roll them into balls. Place each ball onto a parchment-lined tray as you go, making sure they’re evenly spaced. This process should take about 5 minutes. Once all the balls are formed, it’s time to let them chill in the refrigerator for about 15 minutes, allowing them to firm up.
Step 6: Optional Chocolate Drizzle
For an extra touch of sweetness, melt white chocolate chips in the microwave at 30-second intervals, stirring in between, until completely smooth. Using a spoon or fork, drizzle the melted chocolate over the chilled Oreo Protein Balls once they’re set. This final step should take about 2-3 minutes. Allow the chocolate to harden before enjoying your delicious Oreo Protein Balls!
What to Serve with Oreo Protein Balls?
Indulging in these delightful bites is just the beginning—consider pairing them to create a blissful full meal experience!
-
Fresh Fruit Salad: A vibrant mix of seasonal fruits adds a refreshing contrast and is the perfect balance to the sweet protein balls.
-
Yogurt Parfait: Layer creamy yogurt with fruits and granola to complement the chocolatey goodness, enhancing texture and flavor.
-
Nut Butter Spread: A scoop of peanut or almond butter offers a savory touch that harmonizes beautifully with the sweetness of the Oreo protein balls.
-
Green Smoothie: A refreshing smoothie packed with spinach, banana, and nut milk brings a nutritious balance and energizes your snack.
-
Chocolate Milk: Pairing with a glass of cold chocolate milk enhances the decadent flavors, creating a nostalgic treat reminiscent of childhood snacking.
-
Coconut Chips: The crunchy and slightly sweet coconut chips provide an additional layer of texture, enhancing the overall snacking experience.
-
Homemade Granola Bars: For a wholesome snack bar option, serve alongside homemade granola bars for extra protein and fiber.
-
Herbal Iced Tea: A cool, herbal iced tea offers a calming contrast, perfect for sipping alongside these sweet protein-packed treats.
Enjoy these pairings as a delightful way to elevate your Oreo Protein Balls into a delightful feast!
How to Store and Freeze Oreo Protein Balls
Fridge: Store your Oreo Protein Balls in an airtight container for up to 7 days to maintain their freshness and flavor.
Freezer: For longer storage, freeze the protein balls in a single layer on a parchment-lined tray, then transfer to an airtight container. They can last for up to 3 months.
Thawing: When ready to enjoy, simply transfer the desired amount to the fridge and let them thaw overnight. They’ll be just as delicious!
Reheating: No need to heat these protein bites; they’re best enjoyed chilled straight from the fridge or freezer!
Oreo Protein Balls: Flavorful Twists
Feel free to tweak this recipe and let your taste buds guide you to delicious variations!
-
Nut Butter: Swap in your favorite nut butter (like almond or peanut) to add richness and extra protein.
Add a nutty depth of flavor that’s simply irresistible—your new go-to option! -
Different Cookies: Use gluten-free snickerdoodles or chocolate chip cookies instead of Oreos for various flavor profiles.
Each swap creates a delightful surprise in every bite, inviting more cookie-loving friends to the party! -
Chocolate Variety: Replace white chocolate chips with dark chocolate or milk chocolate chips for a different sweetness level.
Rich chocolatey goodness can be tailored to your personal preferences, making each batch feel special. -
Fruit Add-ins: Toss in some dried fruit like cranberries or raisins for a chewy texture and natural sweetness.
Mixing in these delightful morsels creates an exciting flavor contrast, enhancing your snacking experience! -
Spice it Up: Add a pinch of cinnamon, nutmeg, or even a bit of cayenne for a surprising spicy kick.
These warm spices can elevate the flavor profile, transforming these bites into a unique treat! -
Vegan Version: Replace cream cheese with a plant-based alternative and use maple syrup instead of sweetener for a smooth, vegan-friendly option.
Deliciously creamy yet entirely plant-based—who would’ve thought healthy snacks could be this enjoyable? -
Protein Powder Swap: Experiment with flavored protein powders, like chocolate or cookies and cream, to enhance the cookie flavor.
A creative twist on an already delicious base can bring unexpected delight to your taste buds.
Looking for more delightful treats? Make sure to try these captivating Jack Skellington Oreo pops or energizing Meatballs in Lemon Sauce that add variety to your table!
Expert Tips for Oreo Protein Balls
• Chop Smartly: Ensure your Oreos are chopped finely but not pulverized; a mix of crumbs and chunks adds delightful texture.
• Dough Consistency: If the mixture is too sticky when you form the balls, gradually add more coconut flour until it holds its shape without being overly dry.
• Chill Time Matters: Refrigerate the shaped balls for at least 15 minutes to help them set properly, enhancing their creamy texture.
• Storage Best Practices: Keep Oreo Protein Balls in an airtight container in the fridge for up to a week, or freeze for longer storage without losing flavor.
• Customize Ingredients: Don’t hesitate to substitute Oreos with other gluten-free cookies or try different protein powders for unique flavor profiles!
Make Ahead Options
These Oreo Protein Balls are perfect for meal prep enthusiasts! You can mix the dry ingredients (protein powder, coconut flour, and sweetener) up to 3 days in advance, storing them in an airtight container to maintain freshness. Additionally, you can chop the Oreos ahead of time and refrigerate them separately for up to 24 hours to prevent them from becoming too soft. When you’re ready to enjoy these delightful snacks, simply combine the prepared ingredients with the cream cheese and follow the shaping and chilling instructions as usual. This make-ahead method allows you to whip up a delicious, high-protein treat with minimal effort, ensuring that your busy weeknights are a little sweeter!
Oreo Protein Balls Recipe FAQs
What type of Oreos should I use for the Oreo Protein Balls?
Absolutely, you should use gluten-free Oreos if you need to accommodate dietary restrictions. Regular Oreos work just as well if gluten isn’t a concern. They provide that iconic cookie flavor that complements the protein base beautifully!
How should I store the Oreo Protein Balls for freshness?
You can keep your Oreo Protein Balls in an airtight container in the refrigerator for up to 7 days. Just be sure to keep them sealed well to prevent them from drying out or absorbing any odors from other foods.
Can I freeze the Oreo Protein Balls?
Yes! For longer-term storage, freeze the protein balls. Start by laying them out in a single layer on a parchment-lined tray. Once frozen, transfer them to an airtight container or freezer bag where they can last for up to 3 months. When you’re ready to enjoy, simply move them to the fridge to thaw overnight.
What should I do if my mixture is too dry when making the protein balls?
If your mixture feels dry and difficult to shape, start by adding a bit of almond milk, one tablespoon at a time. Mix thoroughly after each addition until you reach a dough-like consistency that holds together. If it’s still too crumbly, consider adding more cream cheese or coconut flour until it firms up to your desired texture.
Are Oreo Protein Balls suitable for people with nut allergies?
Yes, you can enjoy these protein balls without worrying about nuts. Just ensure that you don’t use any nut-based protein powder or substitutes. Always check your ingredient labels for potential cross-contamination as a precaution, especially with pre-packaged products like protein powder.

Oreo Protein Balls: Creamy No-Bake Treats You’ll Love
Ingredients
Equipment
Method
- Chop the Oreo cookies finely using a food processor, aiming for a mix of fine crumbs and larger chunks. Set aside.
- In a large mixing bowl, combine vanilla protein powder, coconut flour, and monk fruit sweetener. Whisk until well blended.
- Add softened cream cheese and chopped Oreos to the dry ingredients and mix until fully integrated to form a dough-like consistency.
- Adjust texture by adding more coconut flour if too sticky or almond milk if too dry.
- Scoop out tablespoon-sized portions and roll into balls, placing them onto a parchment-lined tray. Chill in the refrigerator for at least 15 minutes.
- Melt white chocolate chips in the microwave, then drizzle over the chilled Oreo Protein Balls. Allow the chocolate to harden before serving.
Leave a Reply