
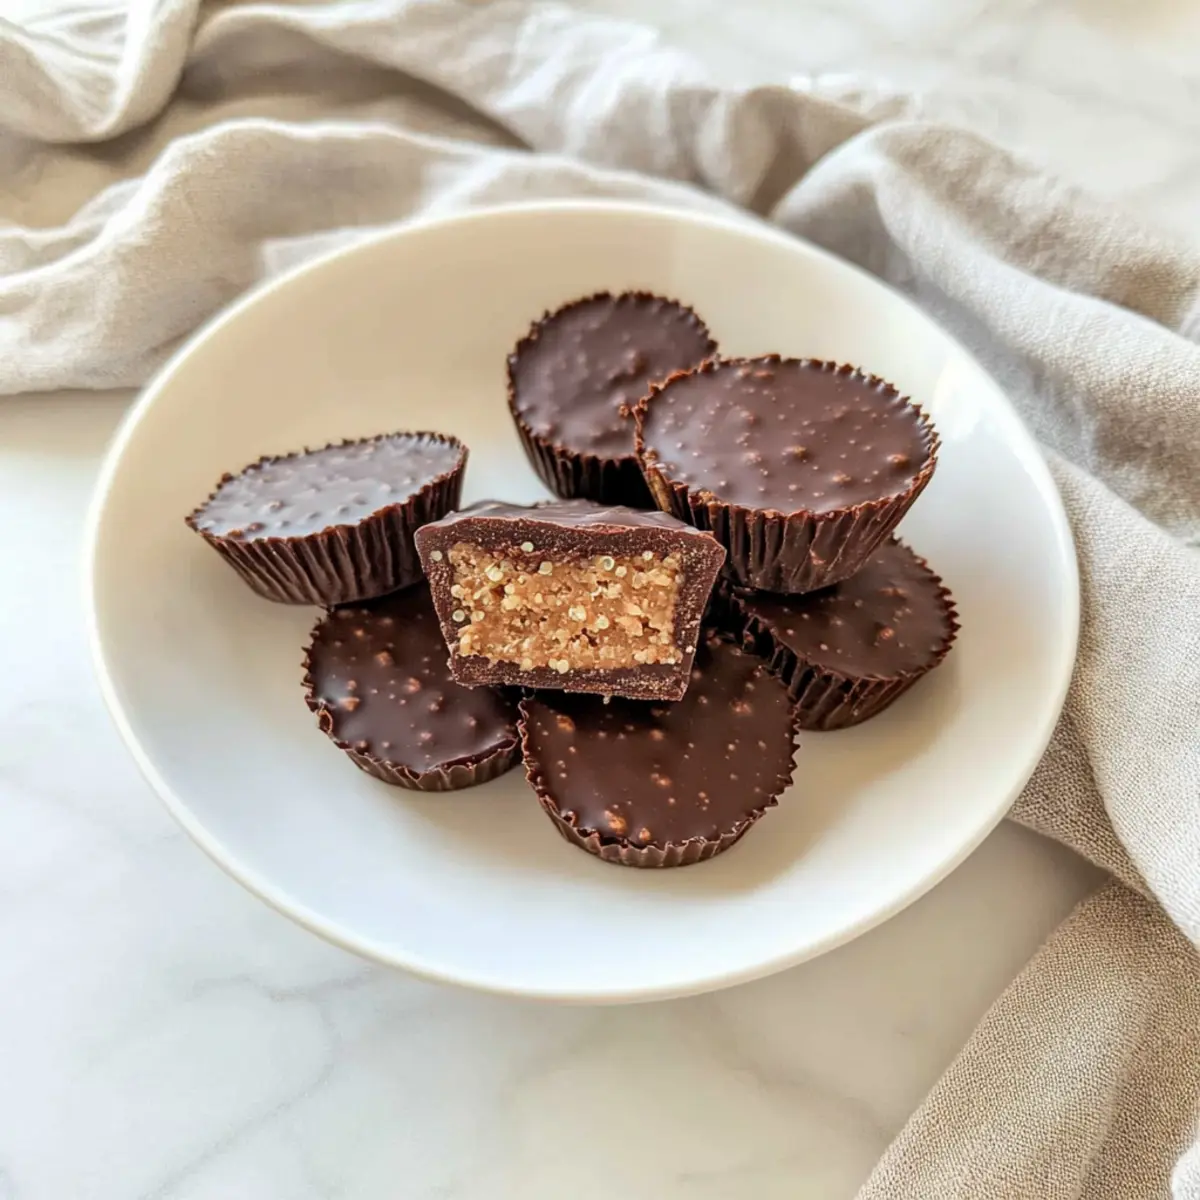
You’ll want to put down that takeout menu because these Quinoa Crunch Peanut Butter Cups are here to save your snack game! Each bite brings a delightful fusion of smooth peanut butter and dark chocolate, perfectly complemented by a satisfying crunch from puffed quinoa. With just a few simple ingredients and no baking required, these vegan treats are not only a breeze to whip up but also make a fantastic guilt-free indulgence. Whether you need a quick treat for your sweet cravings or a fun party snack, these cups deliver on taste and texture without weighing you down. Are you ready to dive into this delectable world of homemade goodness?
Why Are These Peanut Butter Cups Irresistible?
Decadent Flavor: The luscious combination of dark chocolate and creamy peanut butter creates a taste experience that’s hard to resist.
No-Bake Simplicity: With no baking required, these cups come together quickly—perfect for those busy days or spontaneous snack cravings.
Guilt-Free Indulgence: Made with wholesome ingredients, they satisfy your sweet tooth without the guilt that often comes with traditional desserts.
Crowd-Pleasing Treat: Serve them at parties or keep them on hand for yourself; these treats are sure to impress and delight everyone.
Fixed for Any Diet: With their vegan, gluten-free profile, these Quinoa Crunch Peanut Butter Cups cater to a range of dietary needs—making them a versatile option for snack lovers.
Once you try these, you might be inspired to create variations, like using almond butter or trying them out with a hint of sea salt for an extra kick—just like how you’d enjoy them with our Crockpot Butter Chicken or Strawberry Crunch Cheesecake!
Quinoa Crunch Peanut Butter Cups Ingredients
For the Chocolate Coating
- Dark Chocolate – Choose vegan chocolate to keep your Quinoa Crunch Peanut Butter Cups dairy-free.
- Coconut Oil – Adds a silky texture to the melted chocolate; can be swapped with any neutral oil if needed.
For the Peanut Butter Filling
- Peanut Butter – Opt for natural peanut butter containing only peanuts for the best flavor and texture.
- Maple Syrup – Enhances sweetness in the filling; try agave syrup or honey if you prefer a different sweetener.
- Coconut Flour – Helps to thicken the mixture, giving it a firmer consistency; any other flour can work as a substitute.
For the Crunch Factor
- Quinoa Crisps – These are essential for the signature crunch in your cups; use store-bought or toast your own quinoa for a homemade option.
Now that you have everything you need, let’s whip up these delicious Quinoa Crunch Peanut Butter Cups!
Step‑by‑Step Instructions for Quinoa Crunch Peanut Butter Cups
Step 1: Melt the Chocolate
In a microwave-safe bowl, combine dark chocolate chips and coconut oil. Heat the mixture in the microwave at 30-second intervals, stirring well after each session until it’s entirely melted and smooth, taking about 1 to 2 minutes in total. This glossy, creamy chocolate will serve as the delicious outer layer for your Quinoa Crunch Peanut Butter Cups.
Step 2: Prepare the Chocolate Mixture
Once your chocolate is melted, stir in 2 tablespoons of peanut butter and 3 tablespoons of quinoa crisps until everything is well coated. This mixture should be thick yet pourable, holding together nicely while still retaining a crunchy texture. Set this aside briefly as you prepare the peanut butter filling for the cups.
Step 3: Make the Peanut Butter Filling
In a separate small bowl, whisk together the remaining peanut butter, maple syrup, and coconut flour until a thick, dough-like consistency forms. The mixture should hold its shape and be easy to scoop. This creamy filling will be the heart of your Quinoa Crunch Peanut Butter Cups, adding a satisfying richness to each bite.
Step 4: Assemble the Base Layer
Spoon about 1/2 tablespoon of the chocolate mixture into silicone cupcake liners, spreading it evenly to create a base. The chocolate should coat the bottom and slightly rise on the sides, forming a nice shell. Aim for a consistent layer that will become the delightful outer coating of your cups once set.
Step 5: Add the Peanut Butter Center
Take 1 teaspoon of the peanut butter mixture, roll it into a ball and gently flatten it. Place this piece right in the center of the chocolate base in each cupcake liner. This adds the perfect burst of creamy goodness that will balance the crunchy outer layer of your Quinoa Crunch Peanut Butter Cups.
Step 6: Top with More Chocolate
Pour more of the chocolate mixture on top, completely covering the peanut butter center. Ensure it reaches the edges of the liners for a seamless look. The top layer should be smooth and glossy, enticing you as you prepare to chill these delicious treats.
Step 7: Chill to Set
Place the filled silicone liners in the freezer, allowing them to set for approximately 20-30 minutes, or until completely firm. This will ensure the layers meld together beautifully and the texture becomes perfectly crisp, providing that satisfying bite when you dig in.
Step 8: Remove and Enjoy
Once set, carefully peel the peanut butter cups from the silicone liners. The cups should come out easily, revealing their delicious layers. Now, gather your friends and family, or keep them all for yourself—these Quinoa Crunch Peanut Butter Cups are ready to delight with their rich flavor and satisfying crunch!
Quinoa Crunch Peanut Butter Cups Variations
Customize your Quinoa Crunch Peanut Butter Cups for a unique twist that suits your taste preferences!
-
Nut Butter Swap: Use almond or cashew butter instead of peanut butter for a different nutty flavor. Each option brings its unique richness and creaminess.
-
Sweetener Alternatives: If you’re watching your sugar intake, swap maple syrup for a sugar substitute like stevia or monk fruit sweetener—guilt-free and equally delicious!
-
Grain-Free Option: Substitute coconut flour with almond flour for a nutty flavor and a grain-free version that still holds together beautifully.
-
Flavor Boost: Add a teaspoon of vanilla extract or a pinch of cinnamon to the peanut butter mixture for an aromatic touch that elevates the flavor profile.
-
Chocolate Variations: Try using white chocolate or a mix of dark and milk chocolate for a sweeter spin. This can create a delightful contrast with the crunchy quinoa.
-
Crunchy Mix-Ins: Toss in some chopped nuts or seeds for additional crunch. It adds extra texture while also boosting the protein content of your cups.
-
Heat It Up: Add a pinch of cayenne or ground chili powder to the chocolate mixture for a spicy kick that balances the sweetness and adds an exciting zing.
Experimenting with flavors can make your treats even more special, just like pairing them with our comforting Lemon Butter Lobster Risotto on a special occasion or sharing with friends when making delightful Biscuits Honey Butter for brunch!
Make Ahead Options
These Quinoa Crunch Peanut Butter Cups are ideal for those looking to save time during their busy week! You can prepare the chocolate mixture and the peanut butter filling up to 3 days in advance. Just melt the chocolate and mix with the quinoa crisps, then store it in an airtight container in the refrigerator. Similarly, once you make the peanut butter filling, keep it separate in another container until you’re ready to assemble. To maintain the quality, make sure to refrigerate the components to prevent melting or drying out. When ready to indulge, simply layer the chocolate and peanut butter mixtures in your silicone liners, chill until set, and enjoy a no-bake treat that’s perfectly fresh and delightful!
What to Serve with Quinoa Crunch Peanut Butter Cups
Transform your snack time into a delightful experience with these scrumptious pairings that perfectly complement your peanut butter cups.
-
Fresh Berries: A burst of sweetness from strawberries or raspberries provides a vibrant contrast to the rich flavors of the cups. Their tartness balances the creaminess beautifully.
-
Coconut Yogurt Parfait: Layer with granola and fruit for a refreshing contrast. The creaminess of the yogurt pairs well with the crunch of the peanut butter cups.
-
Nutty Granola: Sprinkle on top for an added crunch and depth of flavor. A handful of nutty granola complements the quinoa’s texture.
-
Almond Milk: Smooth and creamy, a glass of unsweetened almond milk enhances the experience and makes for a perfect cleansing sip between bites.
-
Chocolate-Chip Banana Bread: Serve alongside for a nostalgic treat. The moistness of the banana bread contrasts wonderfully with the density of the peanut butter cups.
-
Cashew Cheese: A savory spread that adds a creamy, nutty flavor. It makes a delightful pairing, enhancing the overall snack experience without overwhelming sweetness.
-
Matcha Green Tea: This earthy green tea acts as a lovely palate cleanser. Its unique flavor profile pairs surprisingly well with the rich chocolate and peanut butter.
-
Coconut Bliss Balls: A bite-sized delight that echoes the flavors of your peanut butter cups, these coconut treats will please anyone with a sweet tooth.
-
Homemade Chia Seed Pudding: Top with fresh fruit for a light, nutritious dessert. The smooth texture balances the crunch of the peanut butter cups perfectly.
Expert Tips for Quinoa Crunch Peanut Butter Cups
• Quality Chocolate Matters: Choose high-quality dark chocolate for a richer flavor. Avoid chocolate chips with additives that can affect melting.
• Perfect Peanut Butter: Use natural peanut butter without added sugars or oils. This ensures a smooth filling that pairs well with the chocolate.
• Avoid Overheating: Melt the chocolate slowly to prevent burning. Stirring frequently will help maintain a creamy texture for your Quinoa Crunch Peanut Butter Cups.
• Chilling Time: Be patient while freezing the cups. They need enough time to set properly for that perfect combination of creamy and crunchy.
• Cleanup Made Easy: Use silicone liners for easy removal of the cups. They are flexible and help maintain the shape of your delicious treats.
How to Store and Freeze Quinoa Crunch Peanut Butter Cups
Fridge: Store your peanut butter cups in an airtight container in the fridge for up to 30 days. This keeps them fresh while allowing for a soft, creamy bite.
Freezer: For a firmer texture, place the cups in a tightly sealed container in the freezer for up to 60 days. Remember to separate layers with parchment paper to prevent sticking.
Airtight Required: Always ensure the container is airtight to avoid moisture and unwanted odors, keeping your Quinoa Crunch Peanut Butter Cups tasting delightful.
Reheating: If you prefer a softer treat, let the cups sit at room temperature for a few minutes before serving, allowing the chocolate to soften nicely.
Quinoa Crunch Peanut Butter Cups Recipe FAQs
What type of chocolate is best for these peanut butter cups?
Absolutely, for the best results, choose high-quality dark chocolate. Ensure it’s labeled vegan to keep the recipe completely plant-based. Avoid chocolate with additives, as they can affect melting and overall flavor.
How should I store Quinoa Crunch Peanut Butter Cups?
Store your cups in an airtight container in the fridge for up to 30 days for a soft treat. For a firmer bite, you can freeze them for up to 60 days. Just make sure to layer them with parchment paper to prevent sticking!
Can I make my own quinoa crisps?
Yes, making your own quinoa crisps is very easy! Rinse 1/2 cup of quinoa, then toast it in a dry pan over medium heat for about 10-15 minutes, until golden and crunchy. Allow it to cool before adding to your chocolate mixture.
Are there any allergy considerations with this recipe?
Be mindful of nut allergies, as this recipe uses peanut butter. If you’re serving someone with allergies, consider using sunflower seed butter or another nut-free alternative you prefer. Always check the labels for allergens in chocolate and other ingredients too.
What if my chocolate doesn’t melt smoothly?
Very! If the chocolate isn’t melting smoothly, it could be due to overheating or moisture. Try melting it at shorter intervals, stirring frequently, and ensure your bowl is completely dry. If it becomes grainy, you can add a teaspoon of coconut oil and stir until smooth.
Can I substitute the maple syrup in this recipe?
Sure! You can substitute maple syrup with agave syrup or honey for a different flavor profile. If you prefer a sugar substitute, choose one that measures cup-for-cup like erythritol or monk fruit sweetener to maintain the sweetness balance in your peanut butter filling.
Quinoa Crunch Peanut Butter Cups for a Guilt-Free Indulgence
Ingredients
Equipment
Method
- In a microwave-safe bowl, combine dark chocolate chips and coconut oil. Heat the mixture in the microwave at 30-second intervals, stirring well after each session until it's entirely melted and smooth, taking about 1 to 2 minutes in total.
- Once your chocolate is melted, stir in 2 tablespoons of peanut butter and 3 tablespoons of quinoa crisps until everything is well coated.
- In a separate small bowl, whisk together the remaining peanut butter, maple syrup, and coconut flour until a thick, dough-like consistency forms.
- Spoon about 1/2 tablespoon of the chocolate mixture into silicone cupcake liners, spreading it evenly to create a base.
- Take 1 teaspoon of the peanut butter mixture, roll it into a ball and gently flatten it. Place this piece right in the center of the chocolate base in each cupcake liner.
- Pour more of the chocolate mixture on top, completely covering the peanut butter center.
- Place the filled silicone liners in the freezer for approximately 20-30 minutes or until completely firm.
- Once set, carefully peel the peanut butter cups from the silicone liners.
Leave a Reply