
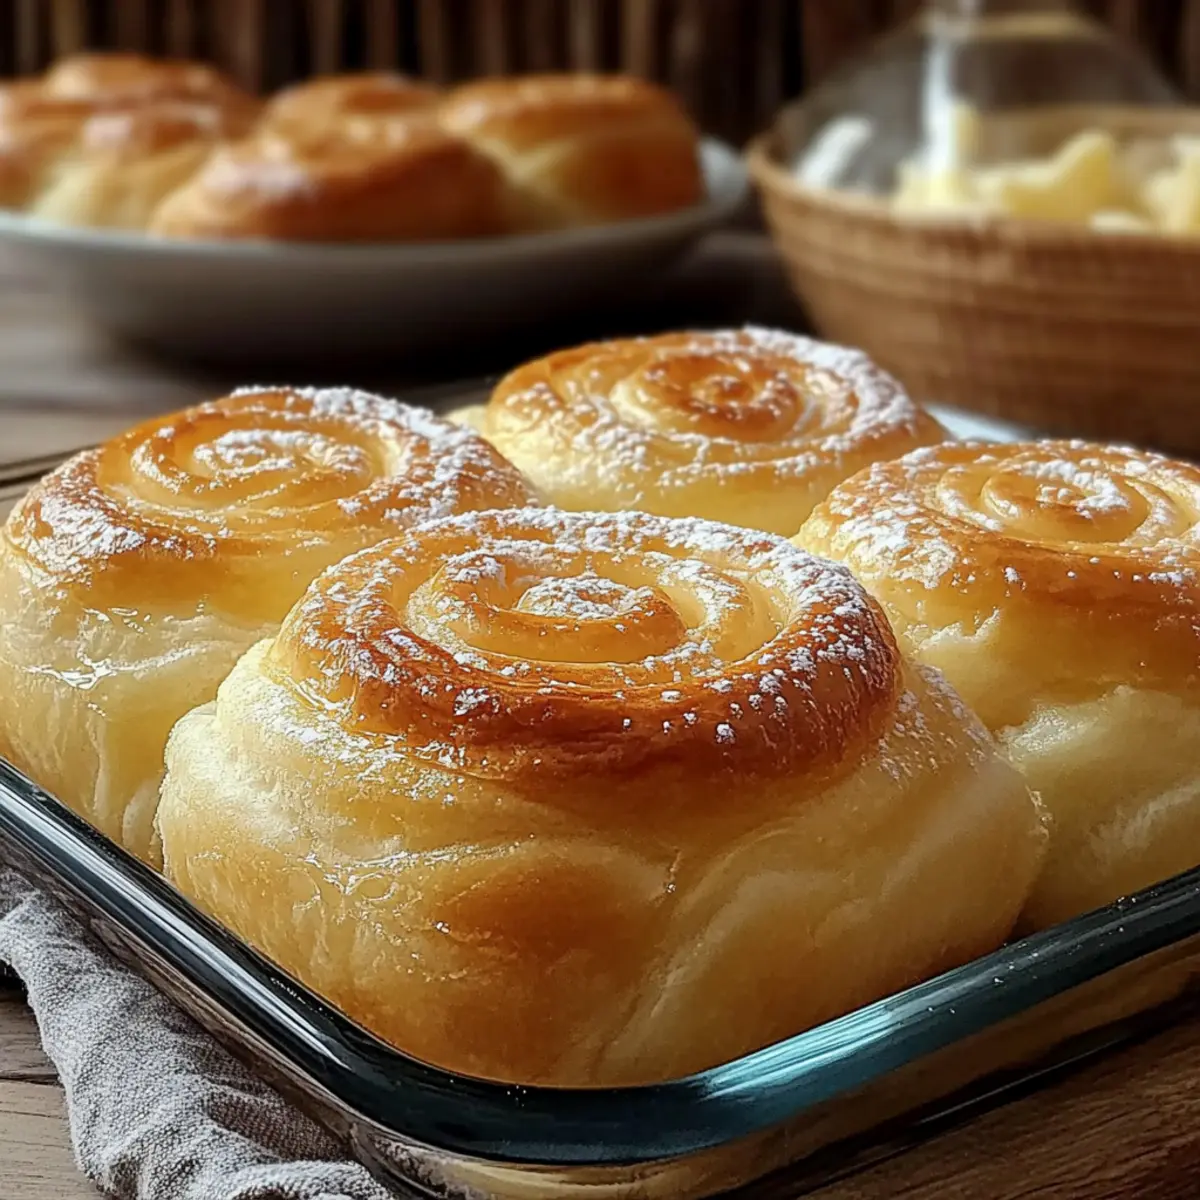
As I stood by the kitchen counter, the sweet aroma of baking bread filled the air, instantly transporting me back to my childhood. It’s in moments like these that I find comfort in making Classic Ensaymada Bread, a beloved Filipino pastry cherished for its pillowy texture and delightful sweetness. What I love most about this recipe is how versatile it is—perfect for breakfast or as a cozy afternoon snack, and a crowd-pleaser at gatherings. With just a handful of ingredients and a bit of time, you can create this homemade treat that warms the heart and brings smiles all around. Plus, with fun twists like Coconut or Chocolate Ensaymada, there’s always room for creativity. Are you ready to fill your kitchen with joy and irresistible scents? Let’s dive into this baking adventure!
Why is Ensaymada Bread a Must-Try?
Melts in Your Mouth: The Classic Ensaymada Bread boasts an airy, fluffy texture that truly captivates your taste buds. You’d want to savor every bite, making it an irresistible choice for any occasion.
Creative Variations: Unleash your culinary creativity with delightful variations like Ube and Chocolate Ensaymada. These twists take traditional bread to new delicious heights!
Easy to Make: With simple ingredients and straightforward steps, anyone can master this recipe—perfect for home cooks seeking an enjoyable baking project.
Perfect Snack or Breakfast: Whether paired with your morning coffee or enjoyed as a snack, this bread transcends occasions, making it a versatile staple in your kitchen.
Sharing Joy: The inviting aroma and mouthwatering flavor of fresh-baked ensaymada bread are sure to impress family and friends, turning any gathering into a memorable experience.
Get started on this adventure, and you’ll soon be looking for an excuse to share your delicious creations, maybe alongside a slice of Strawberry Banana Bread or Shrimp Scampi Bread.
Classic Ensaymada Bread Ingredients
-
For the Dough
• 4 cups all-purpose flour – Provides the necessary structure for the fluffy texture of the Classic Ensaymada Bread.
• 1 cup granulated sugar – Sweetens both the dough and the finish; reduce slightly if you prefer a less sweet treat.
• 1/2 teaspoon salt – Enhances the overall flavor balance; essential but can be reduced for lower sodium.
• 2 1/4 teaspoons instant yeast (1 packet) – Ensures a light and airy rise; using fresh yeast yields the best results.
• 1/2 cup milk, warmed – Activates the yeast and hydrates the dough; feel free to use non-dairy milk if needed.
• 1/2 cup unsalted butter, softened – Adds richness and moisture to the dough; substitute with plant-based butter for a dairy-free option.
• 3 large eggs – Contributes moisture and richness; you can use flaxseed or applesauce as an egg alternative.
• 1 teaspoon vanilla extract – Offers a lovely fragrant flavor; optional for more traditional taste. -
For the Topping
• 1/4 cup butter, melted (for brushing) – Adds a beautiful gloss and enhances flavor before serving.
• 1/4 cup grated cheese (e.g., cheddar or queso de bolsa) – Traditional savory topping; mozzarella or cream cheese can serve as fun alternatives.
• 1/4 cup sugar (for dusting) – Provides a finishing touch of sweetness; adjust to your taste preference.
Step‑by‑Step Instructions for Classic Ensaymada Bread
Step 1: Prepare Ingredients
Gather all your ingredients such as all-purpose flour, sugar, yeast, eggs, and milk to ensure everything is ready for the Classic Ensaymada Bread. This makes the process smooth and enjoyable. Pre-measure the ingredients and have your mixing bowls and a clean countertop ready for the next steps.
Step 2: Activate Yeast
In a bowl, combine 1/2 cup of warmed milk, 2 1/4 teaspoons of instant yeast, and 1 tablespoon of sugar. Let this mixture sit for about 5-10 minutes until it becomes frothy, which indicates that the yeast is active. This is crucial for creating the fluffy texture of your ensaymada.
Step 3: Mix Dry Ingredients
In a large mixing bowl, whisk together 4 cups of all-purpose flour, 3/4 cup of sugar, and 1/2 teaspoon of salt. This step ensures your dry ingredients are evenly distributed and vital for the optimal taste and structure of the Classic Ensaymada Bread. Make a well in the center of the mixture to add the wet ingredients later.
Step 4: Combine Wet Ingredients
In another bowl, beat 3 large eggs and combine them with 1/2 cup of softened unsalted butter and 1 teaspoon of vanilla extract. Mix thoroughly until everything is well blended. The rich mixture will contribute to the moisture and flavor of the ensaymada, creating a delightful dough.
Step 5: Combine Mixtures
Pour the activated yeast mixture and the wet egg mixture into the well of the dry ingredients. Stir everything together until a soft dough forms. This should take a couple of minutes, ensuring all ingredients are well incorporated to start building the base of your Classic Ensaymada Bread.
Step 6: Knead Dough
Flour your countertop lightly, then transfer the dough onto it. Knead the dough for about 8-10 minutes until it becomes smooth and elastic. This step develops the gluten structure, making your ensaymada fluffy. Be sure to periodically add flour to prevent sticking but avoid over-flouring for the best texture.
Step 7: First Rise
Place the kneaded dough in a greased bowl, cover it with a clean kitchen towel, and let it rise in a warm location for about 1 hour or until it doubles in size. You can check this by gently pressing the dough; it should spring back slightly, indicating it’s ready for shaping.
Step 8: Shape Dough
Once the dough has risen, gently punch it down to release the air. Divide it into 12 equal pieces and roll each piece into a circular shape. Add a small amount of softened butter on top of each round, which will contribute to the fabulous flavor of the Classic Ensaymada Bread.
Step 9: Roll and Shape
Take each round of dough and fold it in half, then roll it gently into a spiral shape. Place each spiral in greased molds, ensuring they have room to expand. This shaping technique is crucial for achieving that signature fluffy and airy quality of ensaymada.
Step 10: Second Rise
Cover the molds with a kitchen towel and allow them to rise for another 30-45 minutes until they appear puffy. This second rise is essential for achieving the light texture that makes Classic Ensaymada Bread so irresistible.
Step 11: Preheat Oven
While the dough is rising, preheat your oven to 350°F (175°C). This is the perfect temperature to bake the bread and develop its golden-brown crust. Ensuring your oven is heated properly is key to creating that delightful texture and flavor.
Step 12: Bake
Once the dough has risen, carefully place the molds in the preheated oven. Bake for 20-25 minutes until the tops are golden brown and the bread sounds hollow when tapped. This visual cue is essential for knowing your Classic Ensaymada Bread is ready to be taken out.
Step 13: Cool
After baking, allow the bread to cool in the molds for about 10 minutes. Then transfer them to a wire rack to cool completely. This step prevents the bread from becoming soggy and ensures the perfect texture.
Step 14: Finish
While the ensaymada is still warm, brush them with melted butter and sprinkle with grated cheese, followed by a dusting of sugar. This finishing touch adds a delicious sweet and savory contrast and enhances the overall flavor of your homemade Classic Ensaymada Bread.
Classic Ensaymada Bread Variations
Feel free to get creative and make this recipe your own with these delightful variations that add a new twist to your Classic Ensaymada Bread!
-
Coconut Ensaymada: Stir in shredded coconut to the dough or sprinkle it on top before baking for a tropical flair. The combination of coconut with the sweet bread creates a heavenly melt-in-your-mouth experience.
-
Ube Ensaymada: Infuse your dough with ube puree for a vibrant color and unique flavor. This variation not only looks stunning but also offers a delightful, slightly sweet taste that will have everyone talking.
-
Chocolate Ensaymada: Add cocoa powder to the dough to create a rich chocolate version. Top with chocolate icing for a decadent treat that satisfies all chocolate cravings. This twist is a wonderful surprise for dessert lovers!
-
Nutty Ensaymada: Mix in chopped nuts like walnuts or almonds for a crunchy texture contrast. This adds a satisfying bite that complements the soft fluffiness of the bread perfectly.
-
Savory Cheese Ensaymada: Swap out the sugar topping for a generous layer of cheese, like mozzarella or feta, before baking. This savory option pairs wonderfully with coffee or tea, offering an unexpected delight.
-
Spiced Cinnamon Ensaymada: Incorporate ground cinnamon into the dough for a warm, spiced flavor. A sprinkle of cinnamon sugar on top brings an extra touch of sweetness that balances beautifully.
-
Fruity Jam Topper: After baking, spread a layer of your favorite jam on warm ensaymada for a fruity twist. Marmelade or strawberry jam complement the bread’s fluffy texture and add a burst of flavor that brightens every bite.
-
Matcha Ensaymada: Add matcha powder to the dough for a beautiful green hue and earthy flavor profile. This trendy twist not only looks elegant but also provides a delightful taste contrast that’s sure to impress.
As you explore these variations, consider pairing your Classic Ensaymada Bread with a slice of Herb Cheese Bread or a comforting bowl of Hot Honey Flatbread Pizza to create a delicious meal experience filled with warmth and creativity!
Make Ahead Options
These Classic Ensaymada Bread are perfect for busy home cooks looking to save time in the kitchen! You can prepare the dough up to 24 hours in advance by following the recipe steps through the first rise. Simply shape the dough into spirals and place them in greased molds, then cover and refrigerate the unbaked molds. When you’re ready to bake, let them sit at room temperature for about 30 minutes to regain warmth before preheating your oven and baking. To maintain quality, ensure they are well covered to prevent drying out, and enjoy freshly baked ensaymada that tastes just as delightful as if made that same day!
What to Serve with Classic Ensaymada Bread
Imagine a delightful spread of flavors and textures that perfectly complements the sweet and fluffy Classic Ensaymada Bread, bringing warmth to your table.
- Rich Butter Cream: A dollop of creamy, whipped butter pairs beautifully, adding a luscious layer of flavor that enhances the ensaymada’s sweetness.
- Fresh Fruit Jam: Strawberry or guava jam drizzled on top creates a delightful balance between sweetness and tartness, making each bite exciting.
- Fluffy Scrambled Eggs: The soft, airy texture of scrambled eggs offers a savory contrast, making for a satisfying breakfast or brunch combination.
- Creamy Hot Chocolate: A cup of rich hot chocolate alongside brings a cozy, indulgent touch—perfect for an afternoon treat or chilly mornings.
- Coconut Macaroons: The sweetness from coconut macaroons echoes the tropical flavor of the ensaymada, creating a luscious dessert duo that feels like a treat from paradise.
- Café Latte: Pair with a warm café latte for an energizing boost— the creamy, bold coffee enhances the bread’s sweetness and complements breakfast beautifully.
- Light Salad: A fresh salad with citrus dressing adds a zesty and refreshing touch, balancing the richness of the ensaymada and cleansing the palate.
Expert Tips for Classic Ensaymada Bread
-
Check Yeast Freshness: Always verify that your instant yeast is fresh; it should bubble and foam when activated for the fluffiest texture in your Classic Ensaymada Bread.
-
Room Temperature Ingredients: Ensure butter and eggs are at room temperature before mixing. This promotes better emulsification and improves the dough’s overall texture.
-
Kneading Technique: Knead the dough until smooth; avoid over-kneading which can lead to tougher bread. Follow the timing to achieve the desired fluffy consistency.
-
Appropriate Rising Times: Don’t rush through rising times; allowing the dough to rise adequately results in a light, airy bread. Be patient during both the first and second rises.
-
Experiment with Toppings: Try various cheese options or sprinkle in unique ingredients to enhance flavors in your Classic Ensaymada Bread. Get creative with toppings!
Storage Tips for Classic Ensaymada Bread
-
Room Temperature: Keep the bread in an airtight container at room temperature for up to 3 days. This helps maintain its fluffy texture and fresh taste.
-
Freezer: For longer storage, wrap the ensaymada tightly in plastic wrap and then in foil, freezing for up to 2 months. This keeps the bread fresh without freezer burn.
-
Thawing: When ready to enjoy, simply thaw the frozen Classic Ensaymada Bread at room temperature or warm it in an oven for a few minutes to regain its delightful softness.
-
Reheating: If you prefer it warm, you can reheat individual pieces in the microwave for 10-15 seconds or in a preheated oven at 350°F (175°C) for about 5 minutes, ensuring they are soft and inviting.
Classic Ensaymada Bread Recipe FAQs
What type of flour should I use for Classic Ensaymada Bread?
I recommend using all-purpose flour for the best results, as it provides the ideal structure and texture. However, if you’re looking for a healthier alternative, you can substitute with whole wheat flour, keeping in mind that it may alter the final texture and flavor.
How should I store Classic Ensaymada Bread?
Store your ensaymada in an airtight container at room temperature for up to 3 days to maintain its fluffy texture. If you want to keep it longer, wrap it tightly in plastic wrap, then in foil, and freeze it for up to 2 months. Thaw at room temperature before serving or warm it in the oven for a few minutes.
Can I freeze Classic Ensaymada Bread?
Absolutely! To freeze, first let the ensaymada cool completely. Then wrap each piece tightly in plastic wrap and place them in a freezer bag, ensuring to remove as much air as possible. They can be frozen for up to 2 months.
What should I do if my dough doesn’t rise?
If your dough doesn’t rise, it’s possible the yeast is old or inactive. Always check that your instant yeast is fresh—try activating it in warm milk and sugar, and look for it to get frothy in about 5-10 minutes. Additionally, ensure your dough is placed in a warm environment, free from drafts, to encourage rising.
Are there any dietary considerations I should keep in mind?
Yes! If you have allergies, be cautious with the cheese topping; avoid using milk products altogether and try plant-based cheese alternatives. Those with egg allergies can experiment with flaxseeds or applesauce for substitution, although the texture may be slightly different.
Can I add extra toppings to my Classic Ensaymada Bread?
Very! Feel free to experiment with different toppings like shredded coconut, chocolate spread, or various nuts. Just ensure any new additions don’t overwhelm the delicate sweetness of the bread. Enjoy creating your own delicious variations!
Classic Ensaymada Bread: A Soft & Sweet Filipino Delight
Ingredients
Equipment
Method
- Gather all your ingredients such as all-purpose flour, sugar, yeast, eggs, and milk.
- In a bowl, combine 1/2 cup of warmed milk, 2 1/4 teaspoons of instant yeast, and 1 tablespoon of sugar. Let it sit for 5-10 minutes.
- In a large bowl, whisk together all-purpose flour, sugar (3/4 cup), and salt. Create a well in the center.
- In another bowl, beat the eggs and combine them with softened butter and vanilla extract, mixing thoroughly.
- Pour the yeast mixture and wet egg mixture into the well of the dry ingredients, mixing until a soft dough forms.
- Transfer dough onto a floured countertop and knead for 8-10 minutes until smooth and elastic.
- Place kneaded dough in a greased bowl, cover with a kitchen towel, and let rise for about 1 hour.
- Gently punch the risen dough down, divide into 12 pieces, and roll into circular shapes.
- Fold each round in half and roll it into a spiral shape, placing in greased molds.
- Cover molds with a towel and let them rise for another 30-45 minutes.
- Preheat oven to 350°F (175°C).
- Bake for 20-25 minutes until golden brown.
- Cool the bread in molds for 10 minutes, then transfer to a wire rack.
- While warm, brush with melted butter, sprinkle with cheese, and dust with sugar.
Leave a Reply